
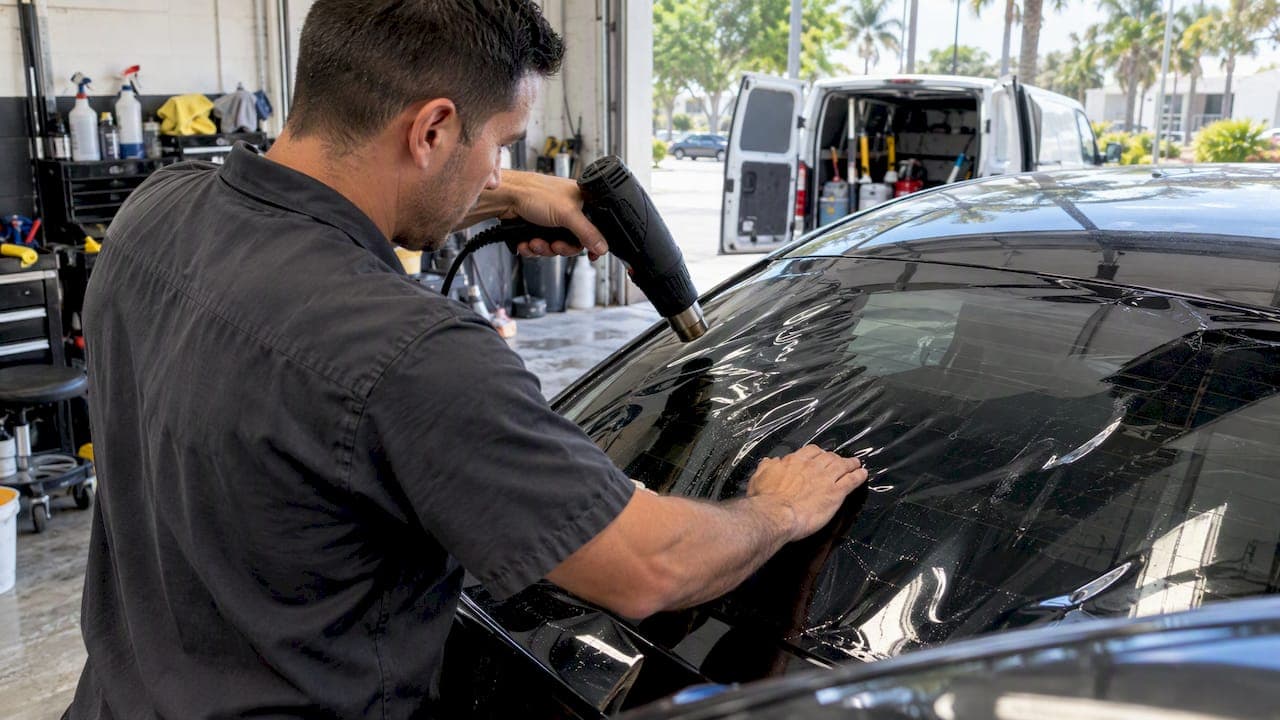
For most curved glass, heat-shrinking PET or ceramic PET film is the right call because it molds the film to match the glass contour. When you're working on a bonded windshield, a sensor-equipped rear window, or plastic glazing, switch to a shrink-free TPU film instead to avoid heat stress near electronics. Match your method to the glass, not the other way around.
TL;DR:
- Use heat-shrink PET or ceramic PET films for most curved glass and switch to shrink-free TPU for bonded or sensor-heavy windows to prevent heat stress on electronics.
- Proper pre-shrinking outside the vehicle is crucial for complex curves, requiring careful heat application to eliminate fingers and wrinkles before wet application.
- Trim the film with a small gap from seals and metal trims, and avoid tight cuts that can cause lifting or jamming on roll-down windows.
- Most defects, like bubbles or hazy spots, typically resolve during cure, but localized re-heating and edging adjustments are necessary for persistent issues.
- For extreme curves, panoramic roofs, or sensor areas, professional installation with the correct film type is recommended to avoid damaging sensitive electronics and achieve long-lasting results.
Table of Contents
- Tools and materials you need before you start
- How to pre-shrink film for highly curved glass
- Wet application, trimming, and getting clean edges
- Fixing common problems and inspecting the final job
- When curved tinting becomes a pro job
- Keeping curved tints looking sharp over time
- Why your car's shape changes the whole job
- Author perspective: hands-on tips from a professional installer
- How we handle complex curved installs at South Miami Tint
- FAQ
- Sources
Tools and materials you need before you start
Curved glass punishes sloppy prep, so gather everything before the film touches the window.
- A variable-heat gun (set between 300°F and 500°F depending on film type) and a soft felt or Teflon-edged hard card.
- A spray bottle with slip solution (a few drops of baby shampoo per quart of distilled water works well).
- A sharp snap-blade knife with fresh blades swapped every few cuts to avoid dragging or tearing film.
- Microfiber towels, a seam roller, and a heat-safe glove for close shrink work.
Film choice matters as much as technique. Standard dyed or metalized PET shrinks easily and is forgiving for beginners, but it won't match the infrared rejection of ceramic PET. Ceramic PET shrinks almost as readily and adds heat performance, which is why 3M's Crystalline datasheet recommends wet application with heat shrinking for complex curves while noting the film's non-metalized construction avoids interfering with onboard electronics. For bonded or sensor-heavy glass, shrink-free TPU film like STEK's NEX+ Curve skips the high-heat step entirely and is built for panoramic roofs and non-glass substrates.
Pro Tip: Keep your heat gun moving constantly. Holding it still for even a few seconds on ceramic PET can scorch the film or stress the glass near a defroster grid.
How to pre-shrink film for highly curved glass
Pre-shrinking outside the vehicle, before any adhesive touches the glass, is what separates a clean install from one full of trapped wrinkles.
- Lay the film on the outside of the glass, dull side facing you, and anchor it with small pieces of tape at the corners.
- Pull the film taut and look for the "fingers," the loose folds that form where the glass curves away from a flat sheet.
- Apply heat directly to each finger until it tightens into a small zigzag crease, working one finger at a time.
- Card the heated crease flat and firm, pressing from the center of the fold outward.
- Repeat around the entire perimeter, always shrinking toward the factory edges and corners rather than toward the center of the glass.
- Test-fit the shrunk film dry against the glass before moving to the inside wet-apply step.
Avoid lingering near defrost lines, antenna elements, or camera housings when applying static cling window films. For long one-piece rear windows and panoramic roofs, work in smaller sections and re-check fit often since the curve changes across the span. Marine acrylic behaves differently than automotive glass and scratches more easily, so lower heat and more passes work better than fewer high-heat passes.
If you're using STEK's NEX+ Curve or another shrink-free TPU film, the pre-fit step is lighter: the film flexes into the curve on its own, and manufacturer guidance caps the heat you should apply, since excess heat defeats the purpose of a shrink-free product. The IWFA's inspection guidelines note that a properly pre-shrunk film should sit flat against the glass with no visible fingers before it ever gets wet-applied, which is the real test of whether this stage is done.
Wet application, trimming, and getting clean edges
Once the film is pre-shrunk and shaped, move inside the vehicle for the wet apply.
- Spray slip solution generously on both the glass and the adhesive side of the film before positioning it.
- Squeegee from the center outward in overlapping passes, working air and excess solution toward the edges rather than trapping it in the middle.
- Trim the top and side edges first while the film is still wet and repositionable, then finish the bottom edge last.
- Leave a small gap rather than shaving the film flush against rubber seals or metal trim, since film cut too tight tends to lift during curing.
The IWFA's guidelines recommend a top-edge gap of about 1/32 to 1/16 inch for most films, with thicker safety or security films accepting a slightly larger gap. Fixed glass, like quarter windows, tolerates tighter trimming since there's no channel to clear. Roll-down windows need extra clearance at the top edge so the glass doesn't catch the film as it travels up and down, and a line that looks fine on a fixed window can jam a regulator on a door glass.
Fixing common problems and inspecting the final job
Most curved-glass defects fall into a few predictable categories, and most have a fix.
- Small bubbles or a light haze right after install often clear on their own as the adhesive cures over the next few days.
- A visible crease or finger that didn't fully shrink needs localized reheating and re-carding rather than a full reapplication.
- Edge lift usually means the film was trimmed too tight against a seal; relieve the edge slightly or re-cut that section.
- Persistent haze that doesn't clear after a full cure cycle, especially in large patches, usually means the film needs to come off and go back on.
For inspection, the IWFA standard calls for viewing the glass at right angles from about 3 feet away, and it allows minor, unobtrusive blemishes that don't draw attention under normal viewing conditions. If a flaw only shows up when you're inches from the glass with the sun behind you, it likely passes. For more detail on specific defects, our guide to common tinting installation issues walks through fixes for bubbles, haze, and curing timelines.
When curved tinting becomes a pro job
Some situations are worth handing off rather than risking a $150 piece of glass.
- Bonded windshields with embedded sensors, cameras, or rain detectors where misapplied heat can shift calibration.
- Composite or acrylic glazing on boats, where heat tolerance is lower and scratches are far more visible.
- Panoramic roofs and one-piece rear windows with extreme curvature where fingers multiply fast.
Before hiring anyone, ask which film series they install, what warranty backs it, whether their process is sensor-safe for your specific windshield, and whether they've worked on your model before. Walk away from anyone who insists on high-heat shrinking near a modern sensor windshield or who can't show a portfolio or written warranty.
Pro Tip: A shop that mentions shrink-free TPU options for sensor areas, without you having to ask, usually knows what they're doing.
Keeping curved tints looking sharp over time
Curved glass installs face more mechanical stress than flat windows because the film is under slightly more tension at every fold and seam. Avoid rolling down a freshly tinted window for the first several days so the adhesive fully cures for the curve. Skip ammonia-based cleaners, since they attack the dyes and adhesive layers in PET and ceramic PET film alike; a mild soap and water or a film-safe cleaner is a safer long-term habit.
Pay closer attention to the edges on curved windows than you would on flat glass. Edge lift shows up first at tight corners and along the top of rear windows, so a quick visual check every few months catches problems early. Direct, prolonged sun exposure on panoramic roofs can accelerate wear at the shrunk fingers faster than on the rest of the film, so parking in shade when possible helps the install last. TPU shrink-free films tend to hold their shape with less long-term stress at these fold points since they were never forced into tension the way heat-shrunk PET is, which is part of why products like STEK's NEX+ Curve are gaining ground on panoramic roofs specifically.

Why your car's shape changes the whole job
Every vehicle presents its own curved-glass puzzle. Sports cars with aggressively raked rear glass concentrate several tight fingers in a small area, which means more shrink work packed into less film, and our guide to window film for sports cars covers fitting techniques specific to that steep curvature. Panoramic roofs stretch the opposite problem across a much larger surface, where a small shrink error early on compounds by the time you reach the far end, a challenge we cover in our panoramic roof tinting guide.

Truck slider and pickup rear windows add a different wrinkle: the sliding center section moves independently of the fixed side glass, so film has to be cut and fitted as separate pieces with careful attention to the tracks. Older vehicles with pitted or slightly warped glass from age can also cause film to telegraph imperfections that wouldn't show on newer glass, which is worth checking before you commit to a full shrink-and-apply session.
Author perspective: hands-on tips from a professional installer
Working mobile installs across Miami-Dade means seeing every curve shape a windshield or rear window can throw at you. One habit worth adopting: dry-fit and fully pre-shrink outside the vehicle before any adhesive is involved, every time, even on films that claim to need less shrinking. It catches problems while they're still cheap to fix. Always follow the specific film manufacturer's instructions and keep your warranty paperwork, since skipping a documented step can void coverage.
— Jose
How we handle complex curved installs at South Miami Tint
If a panoramic roof, sensor-equipped windshield, or sliding truck rear window has you second-guessing a DIY attempt, we install those shapes at your location with the right film for each one.

- We work with premium ceramic films matched to your glass and electronics.
- Our patterns and procedures are tailored around the specific curve of your vehicle.
- We quote and schedule appointments and provide mobile service at your location.
Check availability or get a quote through our mobile window tinting page and we'll match the right film to your glass.
FAQ
What's the darkest legal tint in Florida?
Florida tint darkness limits vary by window and vehicle type, and the rules are set by state law rather than by any single film brand. Check with a licensed local installer or your state's official vehicle code before choosing a film percentage, since limits differ for windshields, front side windows, and rear glass.
Is $500 a lot for ceramic tint?
It depends on the vehicle and scope of work. A Full Car + Windshield package starts from $500, which reflects a full vehicle job rather than a single window, so the price makes more sense once you factor in every piece of glass being covered.
Is 70% tint legal in all states?
Always confirm your specific state's current regulations rather than assuming a percentage that worked elsewhere applies to you.
Is 20% or 35% tint darker?
Lower numbers let in less light, which means a darker, more private appearance on the glass.
Sources
- NEX+ Curve | STEK USA
- 3M™ Automotive Window Film Crystalline™ Series technical data sheet
- Automotive Visual Inspection Guidelines For Applied Window Film (IWFA)