Getting pulled over in Miami because your tint is too dark is an experience nobody wants. The tint installation inspection process catches more South Florida drivers off guard than you might expect, and the consequences go beyond a simple warning. Whether you just got your windows tinted or you're planning to, understanding exactly what inspectors check, what the law requires, and how to verify quality before you hit the road can save you money, time, and serious headaches. This guide walks you through everything, from legal thresholds to post-install care.
Table of Contents
- Key takeaways
- Understanding South Florida's legal tint requirements
- Preparing for a quality tint installation
- Step-by-step tint installation inspection process
- Common issues found during tint inspections
- Post-inspection care and long-term compliance
- My honest take on tint compliance in South Florida
- Get compliant, quality tint installed at your door
- FAQ
Key takeaways
| Point | Details |
|---|---|
| Know your VLT limits | Florida law sets minimum light transmission percentages by window position. Front side windows must allow at least 28% VLT. |
| Keep documentation ready | Installer compliance labels and medical exemption certificates must be in your vehicle during any traffic stop inspection. |
| Environment affects quality | Professional installations in controlled temperature and humidity conditions produce tint that passes both visual and meter-based checks. |
| Inspect before you drive | Check for bubbles, haze, creases, and gaps yourself right after installation so problems are caught under warranty. |
| Respect the curing window | Avoid rolling down windows for 3 to 5 days post-installation to prevent adhesive failure that leads to re-tinting costs. |
Understanding South Florida's legal tint requirements
Before you think about the tint installation inspection process, you need to know what you're being measured against. Florida has specific visible light transmission rules that apply differently depending on which window you're talking about.
Florida tint law sets these minimums:
| Window location | Minimum VLT required |
|---|---|
| Front side windows | 28% VLT |
| Rear side windows | 15% VLT |
| Rear window | 15% VLT |
| Windshield | Non-reflective tint above the AS-1 line only |
Here's what trips most people up: the 28% rule on front side windows is stricter than many other states, and a lot of aftermarket tints sold cheaply don't actually meet that threshold. Choosing the wrong film is the biggest compliance risk, bigger than any installation flaw on its own.
A few more things worth knowing:
- Medical exemptions exist. Drivers with documented conditions like lupus or other light-sensitive disorders can apply for a medical exemption allowing darker tint. You must carry the paperwork in your vehicle at all times.
- Installer labels are mandatory. Compliance labels must be placed inside the driver's door jamb by your installer. No label means no proof of legal installation.
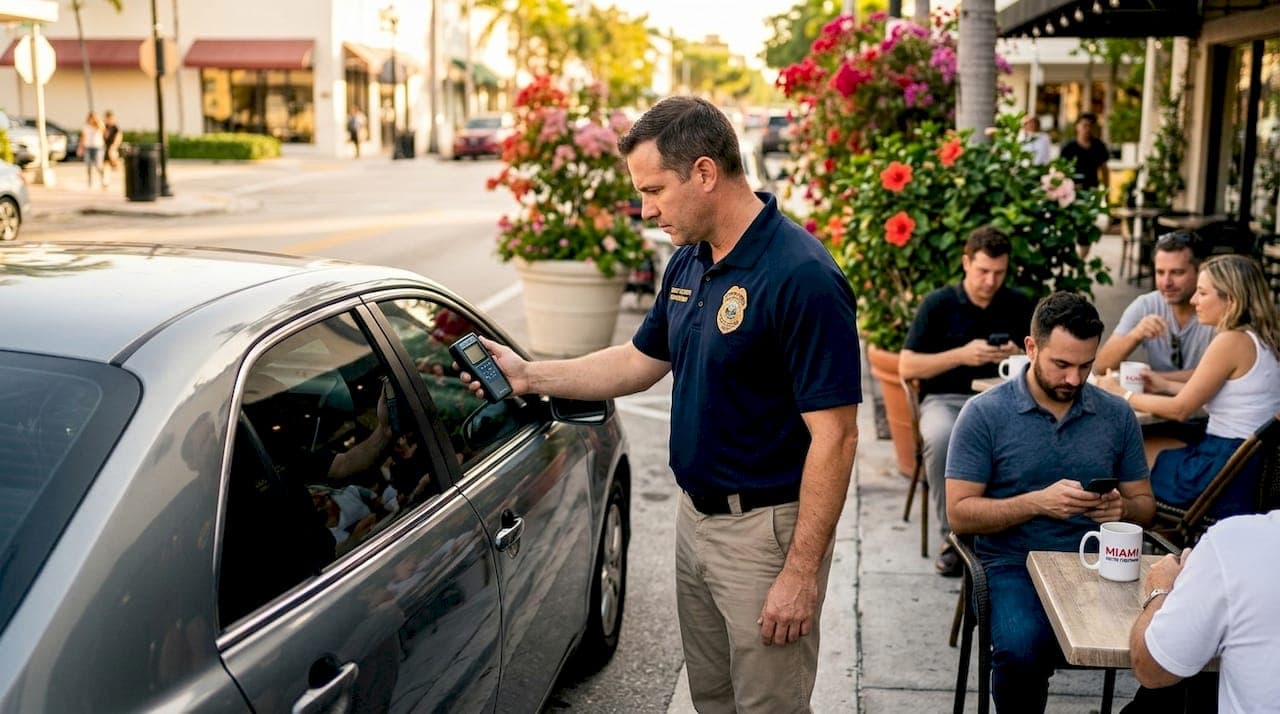
- Enforcement happens at traffic stops. Florida officers use calibrated tint meters during stops rather than at routine annual inspections. You could drive legally for years and never be checked, or get stopped on your first week with new tint.
- Fines are manageable but real. Tint violations are nonmoving infractions typically carrying a $30 fine, and courts often waive them if you correct the issue promptly. But the cost of removing and re-tinting your windows is far higher.
Knowing these rules cold before your installation appointment puts you miles ahead of most drivers in Miami-Dade. You can also review the Miami tint regulations in more detail to catch any county-level nuances.
Preparing for a quality tint installation
Passing the tint installation inspection process starts long before an inspector ever points a meter at your window. The conditions under which your film gets applied directly determine whether it survives scrutiny.
Professional shops maintain indoor temperatures between 65 and 75 degrees Fahrenheit and humidity levels between 40 and 60 percent during installation. South Florida's heat and humidity make this especially challenging outdoors. A film applied in a hot, dusty parking lot has a dramatically higher chance of developing bubbles, peeling edges, or trapped debris that will show up immediately under visual inspection.
Here's what to look for when choosing your installer:
- Does the shop work in a climate-controlled or enclosed environment?
- Do they use professional tools including squeegees, heat guns, and precision blades? Proper tooling is what separates a clean bond from an uneven one with visible creases.
- Do they carry films that are verified compliant with Florida VLT requirements?
- Will they provide the required installer label for your door jamb?
- Can they supply documentation you can keep in the vehicle?
Paperwork checklist to keep in your car after installation:
- Installer compliance sticker (inside driver's door jamb)
- Receipt showing the film type, VLT percentage, and installer information
- Medical exemption certificate, if applicable
- Copy of your film's product specifications from the manufacturer
Pro Tip: Ask your installer for the VLT specification sheet for the exact film going on your car. If they cannot produce it, that is a red flag. A reputable shop using certified films like 3M IR or Iviron Kollmax ceramic will have this documentation ready.
The difference between a DIY attempt and a professional auto tinting job is not just aesthetics. It's the documentation, the controlled environment, and the accountability that come with a licensed installer.
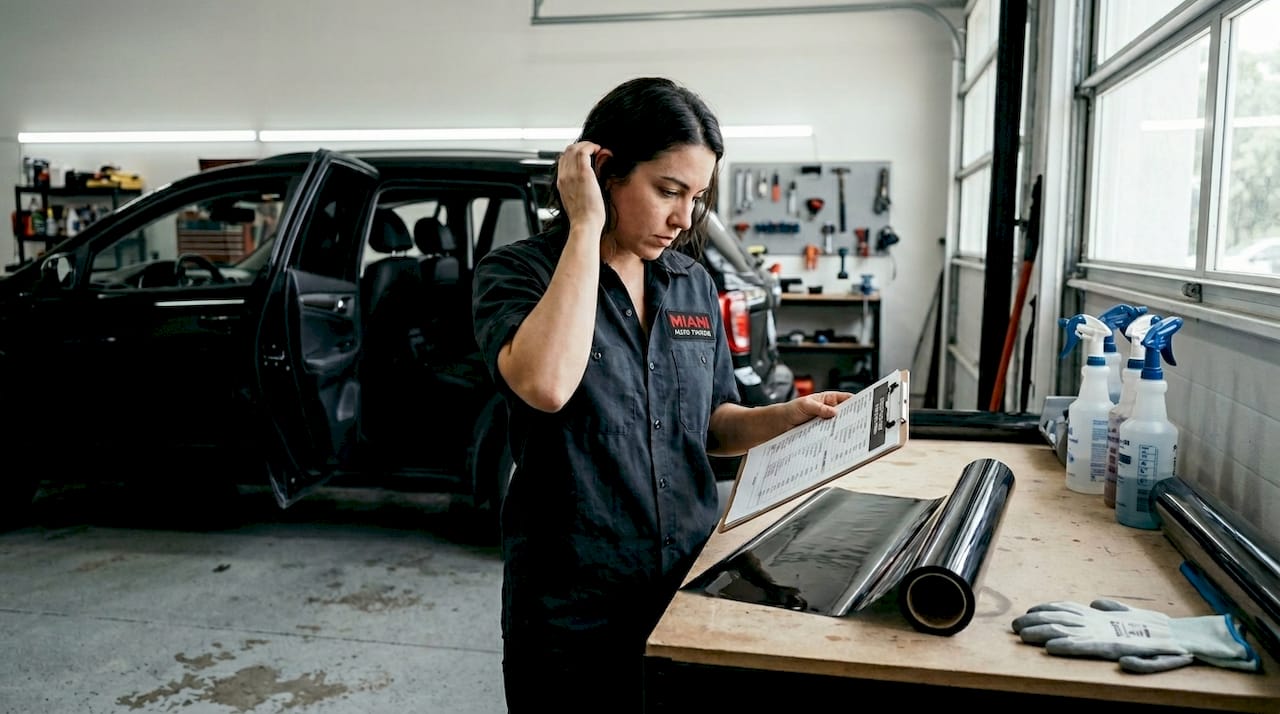
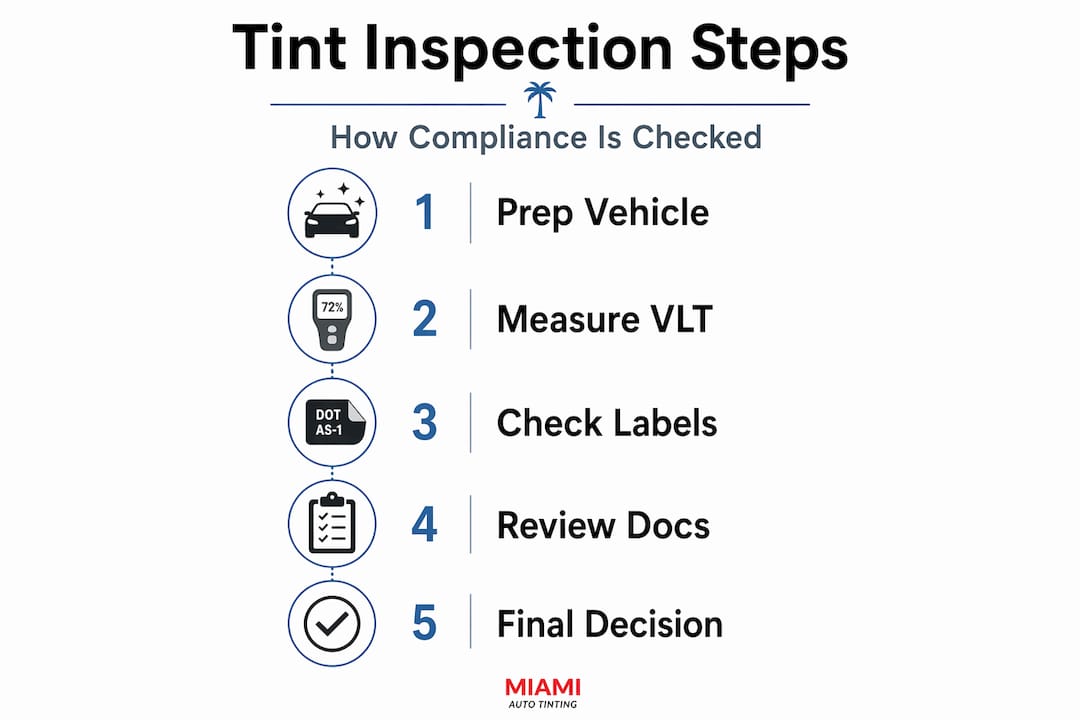
Step-by-step tint installation inspection process
Whether you're doing your own car tint quality assessment or preparing for a traffic stop, knowing exactly what gets checked is powerful information.
-
Visual surface check. The first thing any inspector or trained eye looks for is surface defects. Bubbles, haze, creases, dust, and gaps along the edges are all immediate red flags. Hold each window up to direct sunlight and look at the film from multiple angles.
-
Edge alignment review. The film should reach cleanly to the edges of the glass without lifting, curling, or leaving visible gaps. A hair-width gap lets in light that throws off VLT readings and creates entry points for moisture.
-
Tint meter measurement. This is where legal compliance lives or dies. A calibrated tint meter gets placed on the window glass and reads the percentage of light passing through. During a traffic stop, officers run this test on any window they suspect is non-compliant.
-
Documentation verification. The inspector checks for the installer label in the door jamb. If you have a medical exemption, you present that documentation here. Keeping compliance paperwork in the vehicle expedites this part of the process significantly.
-
Rear and side window cross-check. Inspectors do not stop at the front windows. The full window film installation verification covers all tinted surfaces, comparing readings against Florida's thresholds by position.
Here's how a traffic stop inspection compares to a self-inspection:
| Inspection type | Who performs it | Tools used | Documentation checked |
|---|---|---|---|
| Traffic stop | Law enforcement officer | Calibrated tint meter | Installer label, exemption certificate |
| Self-inspection | Vehicle owner | Visual check, personal tint meter | Personal records |
| Shop audit | Professional installer | Commercial tint meter | Film specs, installer records |
Pro Tip: Buy or borrow a basic tint meter before your installation appointment and test a reference window on a car with known legal tint. This gives you a baseline so you know what a 28% or 15% reading looks like in person.
Common issues found during tint inspections
Even a quality installation can develop problems, and catching them early is what prevents a failed inspection later. These are the most common issues South Florida inspectors and car owners encounter.
Bubbling and peeling. This usually traces back to one of two causes: installation in poor conditions or rolling the windows down too soon. Premature window use before the 3 to 5 day curing period is the most avoidable and most common mistake. Heat and moisture get trapped under the film, and the adhesive bond never fully sets.
Dust and debris under the film. Even a single piece of lint trapped during application creates a visible speck that grows more noticeable over time. This is why controlled installation environments matter so much in South Florida's dusty, humid climate.
Incorrect film selection. A 20% VLT film on a front side window fails Florida law outright, no matter how perfectly it is applied. This is the most costly mistake because the only remedy is complete removal and re-installation with a compliant film.
Edge lifting. Common in vehicles that get regular rain exposure or frequent car washes. Lifted edges allow moisture intrusion, which destroys adhesion from the inside out.
Catching any of these problems within the first week gives you the best chance of a warranty-covered fix. Most reputable installers will redo defective work at no charge during the initial coverage period. Waiting months to report a problem almost always means paying out of pocket.
Remedies to know:
- Bubbling from curing issues: often resolves on its own within two weeks if the film was otherwise applied correctly
- Persistent bubbles or peeling: requires professional removal and re-application
- Dust or debris: no fix exists except removal and reinstallation
- Incorrect VLT film: full removal and replacement with a compliant product
Post-inspection care and long-term compliance
Passing your initial tint installation inspection is not the finish line. How you treat the film after installation determines whether it holds up through the South Florida heat and keeps you compliant for years.
-
Respect the curing period. Adhesive bonding is a gradual process. Keep your windows up for a minimum of 3 to 5 days after installation, regardless of the weather outside. Cracking them even once during this window can cause adhesive failure that is expensive to reverse.
-
Clean with the right products. Avoid ammonia-based cleaners like standard window sprays. They degrade film adhesive and cause premature discoloration. Use a clean microfiber cloth with a mild, ammonia-free cleaner only.
-
Watch for early warning signs. Fading, purpling, or bubbling that appears months later signals film deterioration. Once a film starts to purple, it means the dyes are breaking down, and VLT values may have shifted out of compliance.
-
Check medical exemption renewal dates. If you have a medical exemption on file, exemptions expire and must be renewed. Driving with an expired exemption is the same as driving without one.
-
Schedule periodic check-ups. Especially if your car sits outdoors regularly in Miami-Dade, plan a visual review every 6 months. South Florida's UV intensity accelerates film aging compared to most other regions. Learn more about how Miami's climate impacts tint durability and what film choices hold up longest.
Pro Tip: Take photos of your installer's door jamb label and film documentation right after installation. Store them in your phone's photos app. If the physical sticker ever peels off, you have proof of compliance on hand instantly.
Maintaining tint quality long-term is mostly about avoiding a short list of common mistakes. Do that, and a quality ceramic or 3M IR film should stay compliant and looking sharp for seven to ten years in South Florida conditions.
My honest take on tint compliance in South Florida
I have seen hundreds of tint jobs come through Miami-Dade, and the pattern behind failed inspections is almost always the same. It rarely comes from bad intentions. It comes from car owners who skipped the preparation step, picked a low-cost installer, and never asked about VLT percentages until a police officer was standing at their window with a meter.
The uncomfortable truth is that compliance begins before installation day. The film your installer chooses, the environment they work in, and the paperwork they hand you afterward all determine whether you pass or fail. A beautiful dark tint that reads 18% on your front side window is going to cost you money no matter how good it looks.
What I have also learned is that most drivers underestimate how much the South Florida environment affects installation quality. High heat and humidity genuinely change how film adheres, and a shop that does not account for that is setting you up for bubbles and peeling within the first season. That is not a cosmetic problem. It is a compliance problem waiting to happen.
My advice: ask hard questions before you book. Ask for the film's spec sheet, ask about the installation environment, and ask what happens if the work develops defects. An installer who cannot answer those questions confidently is one you should walk away from.
— Jose
Get compliant, quality tint installed at your door
If you want to skip the guesswork and get tint that passes every Florida inspection, Southmiamitint handles the entire process for you. The mobile service comes directly to your location in Miami-Dade, which means installation happens in a controlled setting without you taking a day off work. Films available include 3M IR, 3M Color Stable, and Iviron Kollmax ceramic, all verified compliant with Florida's VLT requirements. You get the installer documentation, door jamb label, and film spec sheet included with every job. Check out ceramic tint options in Miami starting from $249, or explore 3M tint installation for premium durability and heat rejection. No shop visit required.
FAQ
What VLT is legal for front windows in Florida?
Florida law requires front side windows to allow at least 28% visible light transmission. Anything darker fails the state's minimum threshold and can result in a nonmoving violation during a traffic stop.
How do officers check tint compliance during a traffic stop?
Florida officers use a calibrated tint meter placed against the window glass to measure the percentage of light passing through. Annual inspections do not routinely test tint, so enforcement happens primarily at traffic stops.
What documents do I need to carry for tinted windows?
You need the installer compliance label inside your driver's door jamb and, if applicable, a valid medical exemption certificate. Keeping a copy of your film's VLT specification is also recommended.
How long should I wait before rolling down my windows after tinting?
Wait at least 3 to 5 days after installation before rolling down your windows. Rolling them down early can break the adhesive bond and cause peeling or bubbling that requires a full re-tint.
What are the most common reasons tint fails an inspection?
The most common failures are film VLT below the legal threshold, visible bubbles or peeling from improper installation, and missing installer documentation. Choosing a certified installer with compliant film eliminates most of these risks.