
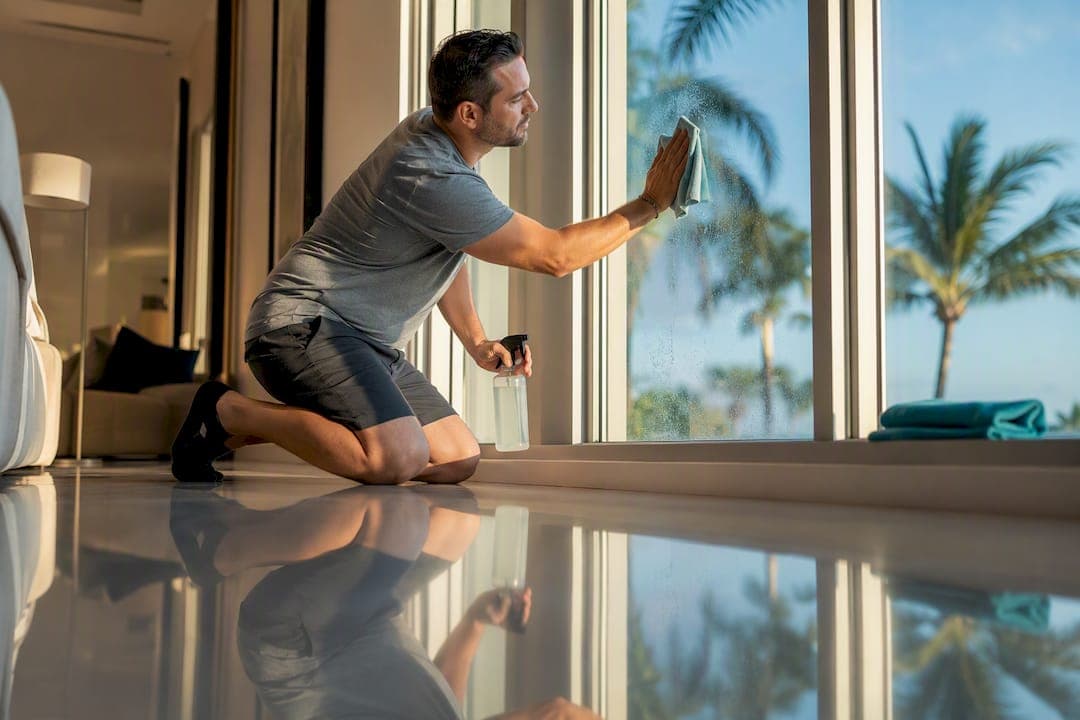
Clear a three-foot path around every window, secure pets in a closed room, and deep-clean the glass and edges at least 24 hours before your appointment. Confirm parking and access with your installer the day before, and have basic tools like a squeegee and low-lint cloths on hand even if a crew like South Miami Tint is bringing professional equipment. Most residential jobs run a few hours to a full day, and following these steps keeps the visit on schedule.
TL;DR:
- Moving furniture and clearing window sills at least three feet back is essential, while deep-cleaning the glass 24 hours prior improves film adhesion.
- Protecting floors with towels and removing blinds or curtains helps prevent damage and ensures a smooth tinting process.
- Old tint, residue, or damaged glass must be fully repaired or removed beforehand to avoid adhesion issues and future complications.
- Scheduling installation in cool, shaded weather avoids excess heat or cold that can interfere with proper film bonding.
- Providing detailed information about your windows and goals upfront ensures an accurate quote and a smoother, faster appointment.
Table of Contents
- Quick Prep Checklist Before Your Window Tint Installation
- How Do You Protect Furniture and Floors During Tinting?
- How Do You Deep-Clean Windows Before Tinting?
- What Tools Do You Need to Prepare for Tint Installation?
- What If You Have Old Tint or Damaged Glass?
- What Happens During the Tint Installation Appointment?
- How Long Does Window Tint Take to Cure and What Should You Avoid?
- South Miami Tint's Inspection Process and What It Prevents
- How Do You Choose the Right Window Film Type and Shade?
- Is Your Window Glass Suitable for Tinting?
- What Are the Local Rules on Window Tint Darkness?
- When Is the Best Weather for Window Tint Installation?
- The Prep Step Most Homeowners Skip and Shouldn't
- Ready to Book Your Window Tint Installation?
- Sources
- FAQ
Quick Prep Checklist Before Your Window Tint Installation
Homeowners who prep the day before rarely run into surprises on install day. Splitting your tasks into two waves, the day before and the morning of. This keeps you from scrambling right as the installer pulls into the driveway.
24 to 48 hours before:
- Move furniture, lamps, and rugs at least three feet back from every window getting film.
- Clear window sills completely, including plants, picture frames, and knickknacks.
- Photograph any windows with cracks, old peeling tint, or hard-water spotting so you can flag them ahead of time.
- Confirm your installer's arrival window, the number of windows on the work order, and whether you need to be present for the whole visit.
- Deep-clean the glass and tracks now rather than waiting, since residue left overnight has time to fully evaporate before application.
Morning of installation:
- Do a final walk-through of each room to catch anything you missed.
- Crate pets, or move them to a room far from the work zone, before the crew arrives.
- Set aside keys, gate codes, or alarm instructions if the installer needs access while you're out.
- Clear a parking spot near the entrance closest to the windows being tinted.
Checking off each item as you go turns a vague "get ready for tint" task into something concrete you can finish in under an hour.
How Do You Protect Furniture and Floors During Tinting?
Give installers roughly three feet of clearance around each window. That buffer is enough room for a ladder, a squeegee pass, and a drop cloth without anyone bumping into your couch or bookshelf.
Lay towels or a drop cloth along the sill and floor directly under the window. Water and slip solution run downhill during application, and a few dry towels save you from mopping up later. If you have hardwood floors or electronics near a window, that towel is doing real work, not just looking tidy.
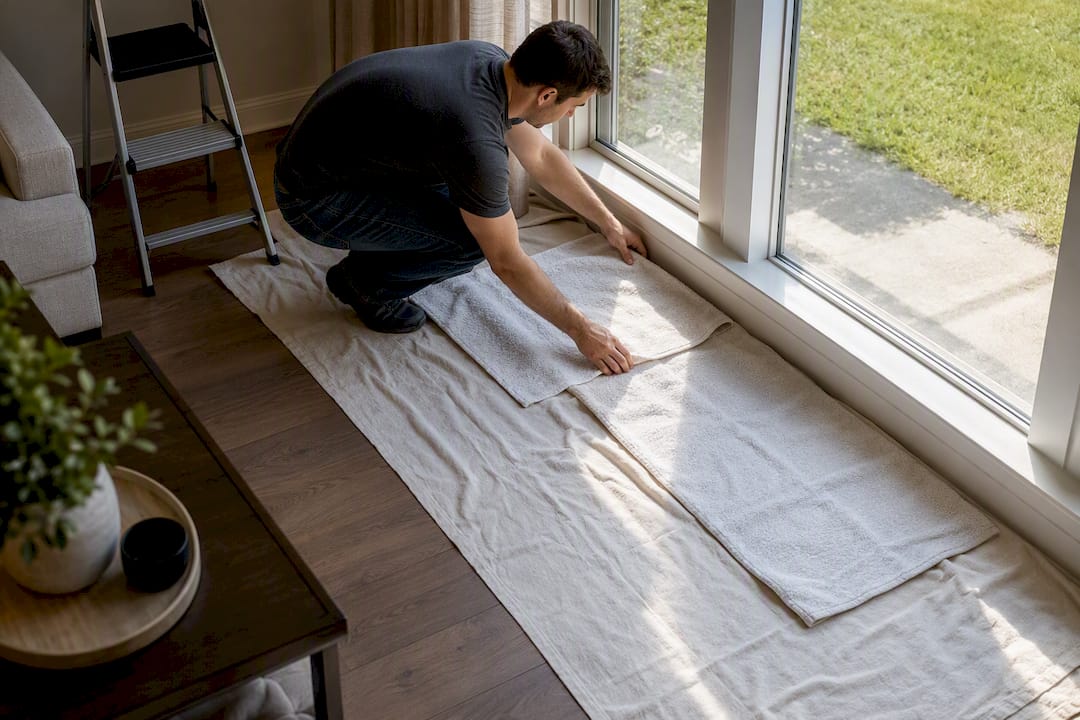
Blinds and curtains generally need to come down or be tied back completely out of the way. Cellular shades and wood blinds are worth removing entirely if you can do it without tools, since a stray edge brushing wet film can leave a mark before it sets. If a treatment is fragile or mounted awkwardly, leave it for the installer to handle rather than risking damage yourself.
Professional installers protect sills and trim by taping down plastic sheeting or laying absorbent barriers before they open a spray bottle. Electronics on side tables, especially anything with vents or exposed ports, should move to another room entirely rather than relying on a towel to catch overspray.
Pro Tip: Set up a small staging area on a counter or table near the work zone for the installer's tools and solution. It speeds up their setup and keeps hardware from getting lost among your belongings.
A few other things worth doing before the crew arrives:
- Reserve a parking spot near the closest entry point, especially in a condo or gated community with limited guest parking.
- Let neighbors know if a work van will need street access for a few hours.
- Note any window that opens outward or has an unusual latch, since that changes how much clearance the installer needs.
How Do You Deep-Clean Windows Before Tinting?
Clean glass is the single biggest factor separating a smooth tint job from one full of trapped bubbles and specks. Installers who deep-clean the glass and edges before applying film consistently get better adhesion and fewer callbacks, which is why most professional workflows treat this step as non-negotiable rather than optional.
Here's the sequence that actually works:
- Mix your slip solution first. A mild mounting solution, roughly one teaspoon of baby shampoo or similar mild soap per quart of water, wets the glass without leaving a residue that interferes with adhesive. Skip ammonia-based cleaners and vinegar right before install. Both can react with certain films or leave streaks that trap moisture under the tint.
- Scrape off caked residue. Use a razor scraper held at a low angle, almost flat against the glass, to lift dried paint specks, sticker residue, or hard-water buildup without gouging the surface. Keep the blade wet at all times; a dry scrape is what causes scratches.
- Wash the full pane. Spray the slip solution generously and wipe with a low-lint cloth, working from top to bottom so drips don't recontaminate a section you already cleaned.
- Squeegee in overlapping strokes. Pull the squeegee horizontally in slightly overlapping passes, then finish with a vertical pass along each edge to catch any debris hiding in the corners.
- Dry the edges and track by hand. A folded microfiber cloth pressed into the frame lifts out the fine grit that a squeegee glides right past.
Cleaning the outside glass matters just as much as the inside, since dust and pollen sitting on the exterior surface can telegraph through as tiny bumps once film goes on. If you spot a chip, crack, or a seal failure between double-pane glass while cleaning, stop and call a glass repair company before your tint appointment. Applying film over compromised glass rarely ends well and can void a film warranty.
Cleaning the day before, not the morning of, gives residual moisture time to fully evaporate. That single scheduling shift is one of the most effective, and most overlooked, ways to reduce trapped debris under the film.
What Tools Do You Need to Prepare for Tint Installation?
Most of what you need for prep work is already in a kitchen drawer or garage shelf. A basic tool list covers the essentials:
- Spray bottle filled with your mixed slip solution
- Rubber squeegee with a firm, straight edge
- Razor scraper (a fresh blade, not a dull one)
- Low-lint microfiber cloths, several
- Measuring tape and a marker for noting window dimensions
- Drop cloths or old towels for the sill and floor
Optional extras include a heat gun or hair dryer, useful for helping film conform around curved glass edges, and exterior sealing supplies if the film you're using is rated for outdoor application. Cut-resistant gloves and safety glasses are worth having any time a razor blade comes out.
If you're leaning DIY, a retail kit from Gila or Lowe's bundles most of this into one box and includes their own step-by-step installation instructions. Retail kits are a reasonable starting point for a single small window or a garage door pane. For anything beyond that, a mobile installer typically brings professional-grade squeegees, heat tools, and premium films like 3M window film that aren't sold at hardware stores, which is part of why most homeowners with more than one or two windows call in a pro rather than working through an entire house solo.
What If You Have Old Tint or Damaged Glass?
Not every window is ready for new film the moment the crew shows up. Old, peeling tint, sticky adhesive residue, or cloudy hard-water spotting on the glass all need extra attention before anything new goes on.
- Peeling or bubbled old tint almost always needs full removal first. It rarely comes off clean on its own, and layering new film over old film traps air and shortens the life of the new install.
- Adhesive residue left behind from old tint can require a stronger scraping pass and additional solution, which adds time to the appointment.
- Tempered, Low-E, or textured glass sometimes needs a different film type or application approach. Mention any unusual glass when you book so the installer brings the right material.
- Deeply scratched or cracked glass should generally be repaired before tinting, since film applied over damage rarely hides it and can trap the crack under a permanent layer.
Photograph anything questionable and send it to your installer ahead of the appointment. Flagging a problem window in advance keeps the schedule and the quote accurate instead of surprising everyone on-site.
What Happens During the Tint Installation Appointment?
Expect a short walkthrough first. The installer confirms the window list, checks goals like heat rejection or privacy, and notes any special cases you flagged earlier. From there, work moves room by room: clean, cut or pre-trim film, apply, squeegee, and finish the edges.
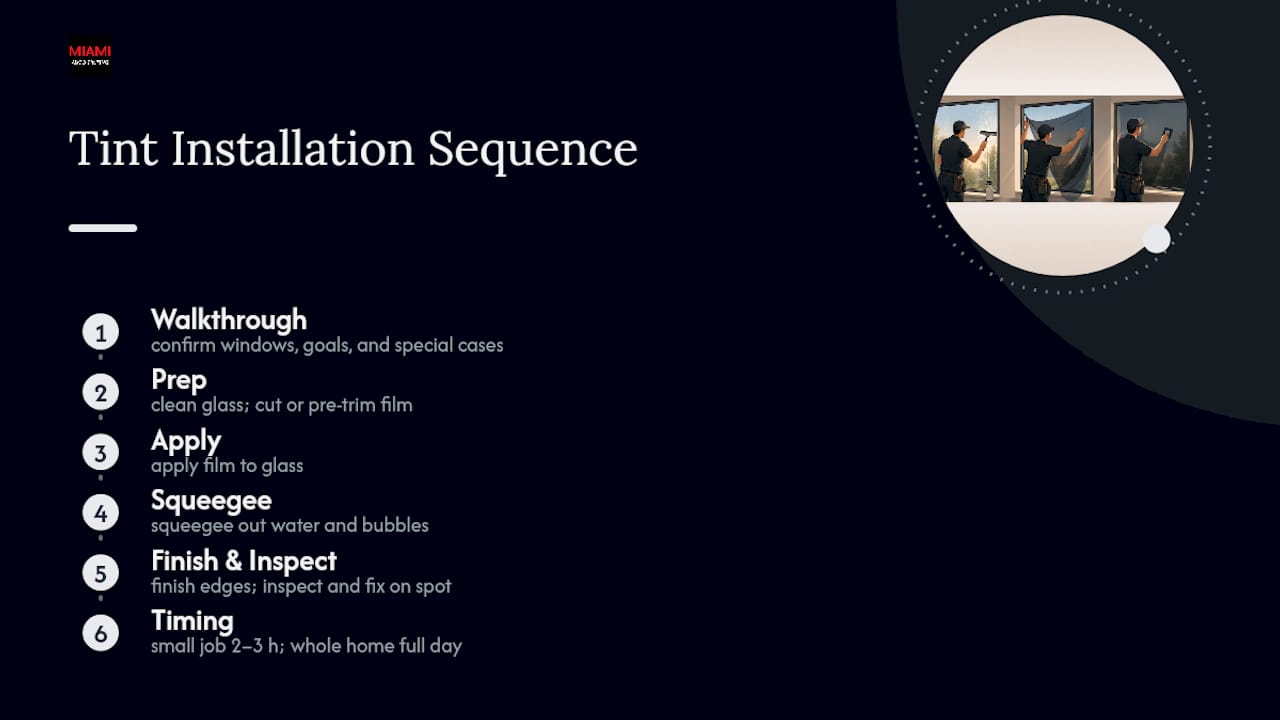
A single room or a few windows might wrap up in two to three hours. A whole-home job often runs a full day, especially with large sliding doors or oversized picture windows that take longer to position without wrinkles. Weather, glass condition, and window count all affect the total.
Your job during application is mostly to stay out of the way. Keep pets contained, avoid opening or closing treated windows, and let the installer handle ladder work near furniture you've already cleared. Before leaving, a good crew inspects every pane for bubbles, lifted edges, or trapped debris and fixes anything on the spot.
How Long Does Window Tint Take to Cure and What Should You Avoid?
A hazy or slightly milky look right after installation is normal. So are tiny water pockets or a bit of waviness. That's moisture working its way out from between the film and the glass, not a flaw.
Curing time varies by film and climate, but many installers advise waiting 3 to 30 days before cleaning the new surface, giving the adhesive time to fully set. Once you're in the clear:
- Use a mild, ammonia-free cleaner and a soft microfiber cloth, never paper towels or abrasive scrubbers.
- Avoid pressing hard on the film or using a squeegee on it during the curing window.
- Watch for water pockets that shrink over the following weeks. That's expected.
- Watch for anything that doesn't improve, persistent bubbling, edges lifting away from the glass, or discoloration. Those are the signals worth reporting to your installer rather than waiting out.
Most cure-related concerns resolve on their own within a few weeks. If something still looks off after that, a quick call to whoever installed the film beats trying to fix it yourself.
South Miami Tint's Inspection Process and What It Prevents
Crews walk every window before quoting a job, checking specifically for old film that needs removal, adhesive residue, and glass condition. That inspection step exists because skipping it is exactly how retint redos happen. A pane that looks fine from across the room can hide peeling edges or a hairline crack that only shows up once film goes on.
For multi-pane and whole-home projects across Miami-Dade, humidity and direct sun exposure both affect how much time a job needs and how film cures afterward. Older tint removal, when it's needed, gets flagged during that initial walkthrough rather than discovered mid-installation, which keeps your quoted timeline accurate instead of stretching into a second visit.
How Do You Choose the Right Window Film Type and Shade?
Start with what you're solving for. Heat rejection, UV protection, glare reduction, and privacy each point toward a different film category, and the right shade depends on which of those matters most in your home.
Measure each window's width and height before requesting a quote, and note whether the glass is flat, curved, or has an unusual frame profile. Rooms facing west or getting direct afternoon sun benefit most from ceramic films built for heat rejection, since they block infrared energy without darkening the room as much as older dyed films did. Bathrooms and street-facing rooms usually call for a darker shade focused on privacy rather than heat performance.
3M offers several tiers worth knowing before you call anyone: 3M Ceramic IR films prioritize heat rejection with a lighter tint, 3M Crystalline pushes heat rejection even further while staying nearly clear, and 3M Color Stable resists fading over years of sun exposure. Ceramic and carbon films generally outperform older dyed tints on heat rejection and longevity, though they cost more upfront.
If you're unsure which shade fits a specific room, take a photo of the window at the time of day it gets the most sun and share it when you request a quote. That single detail helps an installer recommend a film category instead of guessing from a general description.
Is Your Window Glass Suitable for Tinting?
Most standard residential windows, whether single-pane or double-pane insulated glass, accept film without issue. The exceptions are worth checking before you book.
Tempered glass, common in sliding doors, tub enclosures, and windows near the floor, generally tints fine, but it's worth confirming with your installer since some tempered panes have edge treatments that affect adhesion. Laminated glass, often used in impact-rated windows across South Florida, also tints well in most cases and can add an extra layer of shatter resistance on top of its existing safety rating.
Textured or obscure glass, the kind found in some bathroom windows, doesn't always hold film evenly since the surface isn't flat. An installer needs to look at it in person rather than quote it sight unseen. Low-E glass, which already has a coating for energy efficiency, sometimes requires a specific film formulated to avoid interference between the two coatings and potential heat buildup.
Glass that's cracked, deeply scratched, or has a failed seal between double panes should generally be repaired before tinting, not after. Film applied over compromised glass won't fix the underlying problem, and it can make a future repair more complicated. When you're booking your appointment, mention any window you're unsure about so the installer can evaluate it before showing up with the wrong film for the job.
What Are the Local Rules on Window Tint Darkness?
Window tint darkness rules for residential glass are set at the state and local level rather than by a single national standard, and they cover homes far more loosely than they cover vehicles. Most jurisdictions don't restrict how dark a homeowner can go on residential windows the way they restrict windshield and side-window tint on cars.
That said, homeowner associations and condo boards sometimes have their own rules about exterior appearance, including how reflective or dark a film can look from the street. If you live in a planned community, check your HOA guidelines before ordering a highly reflective or very dark film, since some boards restrict mirrored finishes for aesthetic consistency across a neighborhood.
If your property includes any vehicles you're tinting alongside your home windows, automotive tint darkness is regulated separately and tends to be much stricter, with specific visible light transmission percentages required by state law. Ask your installer to confirm current local requirements for any vehicle work at the same visit, since the residential and automotive rules aren't interchangeable.
When Is the Best Weather for Window Tint Installation?
Temperature and sunlight both affect how well film adheres, which is why installers generally avoid working in direct, blazing sun or near-freezing cold. Most guidance points to application working best on cool, shaded glass between roughly 45 and 90 degrees Fahrenheit, since extreme heat causes the adhesive to set too fast, and extreme cold can keep it from bonding properly at all.
Scheduling around Miami's weather usually means avoiding installation during the hottest midday hours in summer, when direct sun on south and west-facing windows can push glass temperature well above ideal range even if the air feels normal. Overcast mornings or early afternoons tend to work better for exterior-facing glass. Rain isn't necessarily a dealbreaker for interior application, but high humidity can slow curing slightly, so factor that into how soon you plan to clean the new film.
If your installer needs to reschedule due to weather, that's a sign they're protecting the quality of the install rather than rushing through it.
The Prep Step Most Homeowners Skip and Shouldn't
The advice you'll find most often, clear the area, clean the glass, is correct but incomplete. What gets left out is timing: cleaning glass the same morning as your appointment is common, and it's a mistake. Residue needs hours to fully evaporate, and a rushed cleanup right before the installer arrives is how tiny specks end up trapped under film that otherwise would have gone on flawlessly.
The other gap in most generic checklists is the old-tint question. Plenty of homeowners assume new film can go straight over an old, faded layer, and plenty of installers have to explain, mid-appointment, why that's not the case. If your windows already have tint on them, that removal step belongs in your planning and your budget from the start, not as a surprise add-on once the crew is standing in your living room.
Prioritize the boring stuff first: clean early, flag problem glass honestly, and confirm access the day before. The interesting parts, choosing a ceramic film, picking a shade, happen fast once the boring parts are handled.
— Jose
Ready to Book Your Window Tint Installation?
The service comes to you, which means no dropping off vehicles or waiting around a shop for a residential crew that never has to leave your driveway. Before you request a quote, gather a few things: rough photos of the windows you want tinted, a window count, your main goal (heat rejection, privacy, or UV protection), and any access notes like gate codes or parking restrictions.

With that information ready, a quote comes back accurate the first time instead of needing a follow-up call. If you're set on premium heat rejection, the 3M ceramic film options are worth a look before you decide on a shade. For most Miami-Dade homes, mobile ceramic window tint starting at $249 covers a straightforward installation without a shop visit. Scheduling is typically available within days, not weeks, so reach out with your window count and goals and get a real number back, not a vague estimate.
Sources
- ComforTech window film installation guide (manufacturer)
- Lowes: How to install window film
- Gila installation instructions (privacy control)
FAQ
Can I tint my home windows myself?
Yes, for a single small window using a retail kit from Gila or Lowe's, though larger jobs or premium films like 3M generally need professional tools and experience to avoid bubbles and misalignment.
What is a good homemade solution for window tinting?
A mild slip solution made from about one teaspoon of gentle soap per quart of water wets the glass properly for application; skip ammonia-based cleaners or vinegar right before installing film.
What are the downsides of DIY home window tinting?
DIY jobs risk trapped bubbles, misaligned edges, and voided film warranties, and removing old tint or handling large or curved panes is significantly harder without professional-grade tools.
What should I do before getting my windows tinted?
Clear a three-foot buffer around each window, deep-clean the glass a day ahead, secure pets, confirm parking and access, and photograph any cracked or already-tinted panes so your installer can plan around them.