
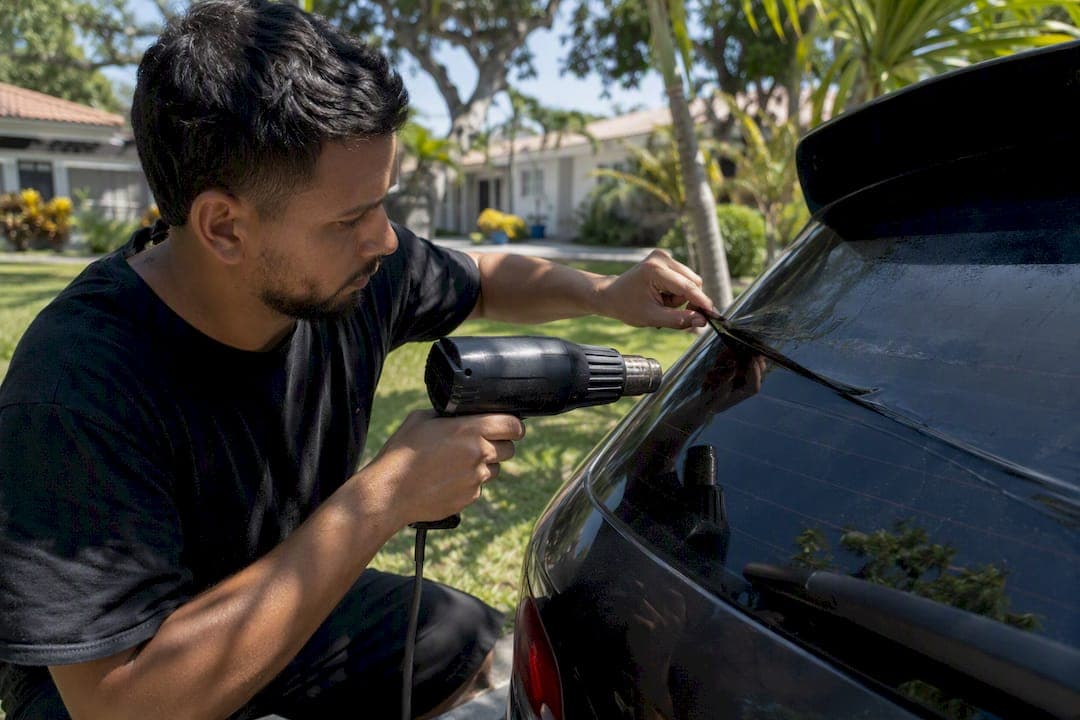
If the lift is under two inches and the edge looks clean, you can usually re-bond it at home with heat and a squeegee. If you see dirt, grit, or purple discoloration under the film, stop. Contamination breaks the seal for good, and repair attempts just waste your afternoon.
Here's your immediate checklist:
- Stop rolling that window down until the edge is fixed or inspected.
- Photograph the lift now so you can track whether it's spreading.
- Keep your fingers off the exposed adhesive. Skin oil finishes off what dust started.
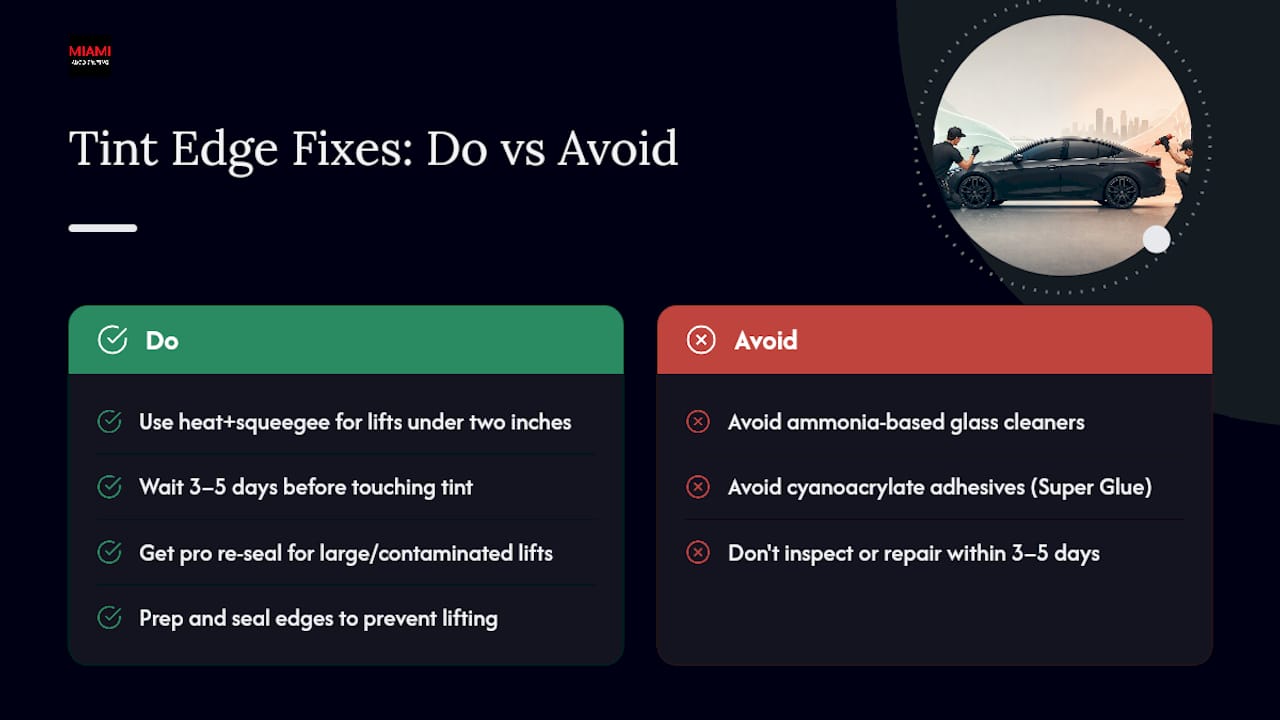
- If the tint was installed within the past few days, leave it alone. The International Window Film Association recommends 3 to 5 days of curing time before you operate the windows at all.
Pro Tip: Snap a photo next to a coin or ruler for scale. If the lift grows between photos taken a few days apart, you're on the clock for a repair rather than a replacement.
Key Takeaways
A successful tint edge repair depends on catching the problem within one to two weeks, matching heat-and-compress or pin-prick methods to a clean diagnosis, and calling a pro once contamination or size rules out DIY.
| Point | Details |
|---|---|
| Diagnose before you fix | Check size, debris, and install age to pick the right method and avoid making it worse. |
| Time limits your options | Acting within one to two weeks gives DIY and pro re-seals the best chance of holding. |
| Heat softens, it doesn't fix dirt | Thermoplastic adhesive responds to gentle heat, but contamination defeats any re-bond attempt. |
| Skip Super Glue entirely | Cyanoacrylate adhesives fog and permanently damage film and glass. |
| Replace when signs stack up | Wide lifts, purple discoloration, or multiple bubbles mean it's time for a pro re-tint. |
Table of Contents
- How to Diagnose Tint Edge Problems Before You Fix Them
- What Tools Do You Need for a Tint Edge Repair?
- Step-by-Step Methods to Fix Tint Edge Lifting and Bubbles
- When Should You Replace Tint Instead of Repairing It?
- How Do You Prevent Tint Edges From Lifting Again?
- When Should You Call a Mobile Tint Pro Instead?
- Why Most Tint Edge Advice Skips the Time Factor
- Frequently Asked Questions About Fixing Tint Edge Issues
- Sources
How to Diagnose Tint Edge Problems Before You Fix Them
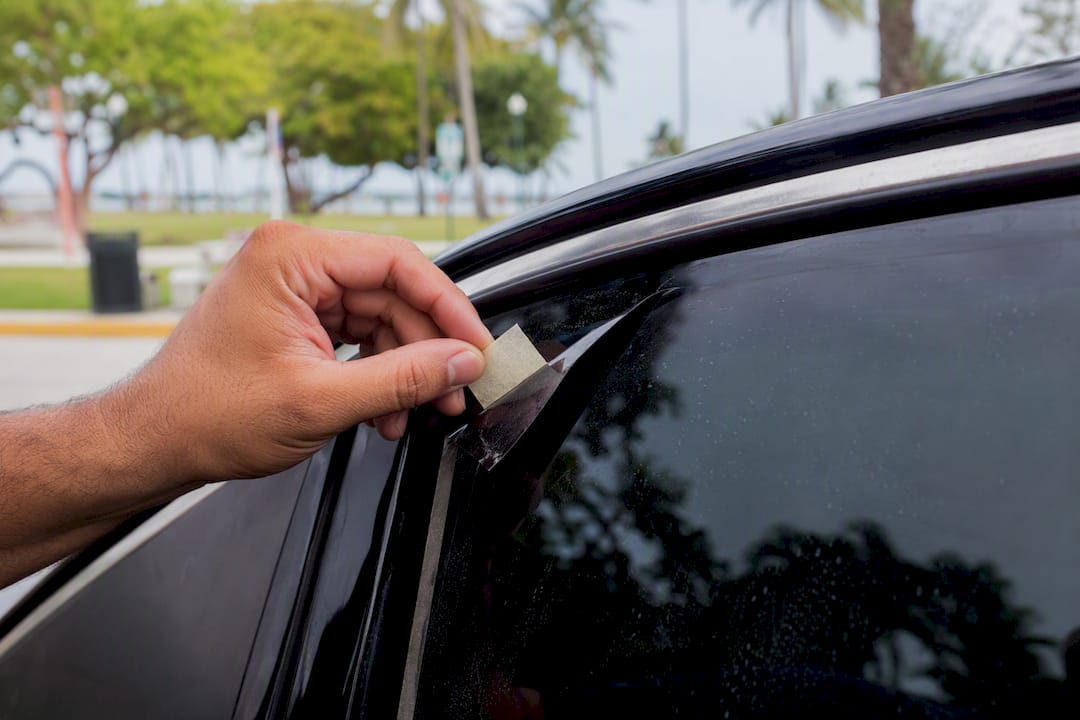
Not every bubble is the same problem, and treating the wrong one the wrong way makes things worse. Edge lift shows up as a curled corner or strip pulling away from the glass, usually where the film meets the rubber trim. Run a fingernail near it (not on the adhesive) and you'll feel the film flex away from the glass rather than stay flat.
Trapped moisture looks cloudy or milky and often clears up on its own within a few weeks as it evaporates through the film. Adhesive contamination is different: you'll spot visible grit, dust specks, or oily smudges under the film, sometimes with a slight purple tint if the film has started to oxidize. Creases are physical folds, usually from a squeegee mistake or the window being rolled down too soon.
Run through this before touching anything:
- Size: Is the lift smaller or larger than two inches?
- Location: Edge, corner, or middle of the glass?
- Debris: Can you see specks or smudges trapped in the bond line?
- Install age: Was this tint applied in the last 3 to 5 days?
A single speck of dust under a corner creates a tiny gap that professionals call "tenting," and it tends to spread rather than heal itself.
Pro Tip: Mark the edge of the lift with a small piece of tape on the glass, not the film. If the tape line and the film's edge no longer match up after a day or two, the lift is actively growing.
What Tools Do You Need for a Tint Edge Repair?
Skip the kitchen junk drawer. A tint repair kit is small, but it has to be the right small.
- A variable-temperature heat gun or a high-power hair dryer set to low
- A hard plastic squeegee (a credit card works in a pinch, but it scratches easier)
- Lint-free microfiber towels
- A sharp razor blade or hobby knife
- A fine sewing needle for the pin-prick method
- A spray bottle with distilled water and a drop of baby shampoo
- A tint-safe, clear-drying adhesive or edge sealer
Skip cyanoacrylate glue entirely. CarTeks warns that Super Glue fumes fog and permanently damage both the film and the glass underneath it. Keep the heat gun at least six inches from the glass, and never aim it directly at defroster lines. Wear eye protection when you're working with a razor near your windshield or door glass, and gloves keep oil off the adhesive you're trying to save.
Step-by-Step Methods to Fix Tint Edge Lifting and Bubbles
Match the method to the diagnosis. Using the wrong fix on the wrong problem is the fastest way to turn a small repair into a full re-tint.
Heat-and-compress for minor lifting:
- Set your heat gun to low or your hair dryer to its lowest heat setting.
- Hold it 6 to 8 inches from the glass, moving constantly in small circles.
- Once the film feels warm and pliable, press it flat with the squeegee, working from the center of the lift toward the nearest edge.
- Let it cool for a few minutes, then check the bond by gently pressing the edge with a dry microfiber towel.
Most tint adhesives are thermoplastic, meaning controlled heat softens them enough to re-bond the film to the glass, but too much heat scorches the film and leaves a permanent optical defect.
Pin-prick method for trapped air bubbles: Use this only when the bubble is clean, with no visible debris inside it. Prick the bubble at a shallow angle with a fine needle, then use the squeegee to push the trapped air out through the puncture toward the nearest edge. The tiny hole is far less noticeable than a bubble, but this trick fails on contaminated bubbles because the debris stays visible no matter how flat you press it.
Re-bonding a lifted edge:
- Gently lift only the affected section. Don't peel back more than you need to.
- Clean the exposed glass and the underside of the film with isopropyl alcohol on a microfiber towel.
- Apply a thin line of tint-safe adhesive along the edge. A little goes a long way.
- Press down firmly with the squeegee, working outward from the center of the repair.
- Let it cure fully before touching the window again. Follow the same wait window installers use for new film.
Crease removal: Small creases sometimes flatten out with slow, even heat and patient squeegee work. Deep creases that have stretched the film past its limit usually leave a visible line no matter how much heat you apply. That's an optical defect, not a repair job, and it means replacement.
Trimming a damaged edge: If a strip is too far gone to save, trim it rather than leave it flapping. Use a fresh, sharp blade and cut just inside the damaged section, leaving a small allowance so you're not cutting flush against bare glass. Warm the trim line slightly before cutting. It keeps the film from cracking and helps the new edge lay flat.
Never do any of the following:
- Use Super Glue or any cyanoacrylate adhesive.
- Clean the glass with ammonia-based products before or after a repair.
- Press hot film with bare or oily fingers.
- Rush the cure time because you're eager to roll the window down.
When Should You Replace Tint Instead of Repairing It?
Time works against you here. Acting within the first one to two weeks after you notice a lift gives you the best odds of a lasting re-seal, because the adhesive is still relatively clean. Wait longer, and dust, moisture, and oils finish the job contamination started.
Replace, don't repair, when you see:
- Lifted sections wider than two inches or spreading across multiple spots
- Visible grit or purple discoloration in the adhesive
- Creases that have permanently stretched the film
- Film older than 5 to 7 years showing widespread bubbling
DIY fixes hold up best when the adhesive is still clean and intact. Once contamination sets in, professional edge-sealing and replacement deliver a more durable result, often backed by a warranty against re-peel that a home fix simply can't offer. If you're weighing whether your film has earned a fresh start, our guide on upgrading existing window film breaks down what newer films do better.
How Do You Prevent Tint Edges From Lifting Again?
Most edge failures trace back to the installation environment, not bad luck. Installers who work in a dust-free, temperature-controlled space and take time to seal the perimeter properly hand you a film that's far less likely to lift months later.
Your part starts the moment the installer leaves:
- Use only ammonia-free glass cleaners. Ammonia breaks down tint adhesive over time.
- Wait the full 3 to 5 days before rolling any window down.
- Inspect edges and seals once a month, especially in the first year.
- Watch for early lifting after big temperature swings. Humidity and heat cycling stress the bond line more than steady weather does.
A single speck of grit under a fresh edge doesn't just look bad. It creates a microscopic gap that keeps the film from making full contact with the glass, and that gap tends to grow instead of heal.
Pro Tip: Keep a dedicated microfiber towel just for your tinted windows. Using the same cloth you use on chrome or paint transfers oils that shorten adhesive life.
For a broader maintenance routine, our step-by-step window film care guide covers seasonal checks worth adding to your calendar. If you want a deeper look at safe glass-cleaning technique, this streak-free cleaning method applies just as well to tinted glass as untreated glass.
When Should You Call a Mobile Tint Pro Instead?
Once contamination, multiple bubbles, or widespread crease patterns show up, DIY tools stop being enough. A mobile technician brings controlled heat, proper adhesive, and the experience to know exactly how far a lifted edge can be pushed before it needs full removal.
Here's what a service call typically includes:
- A full inspection to separate a simple re-seal from a job that needs complete re-installation
- Controlled re-bonding with professional-grade tools and tint-safe adhesive
- Edge sealing to reinforce the perimeter against future lifting
- Full removal and surface prep if the existing film is too far gone
Before you book, ask these questions:
- What warranty backs the repair or the new film?
- Do you recommend ceramic, dyed, or metalized film for my vehicle?
- How long should I wait before rolling my windows down again?
- Do you come to my location, or do I need to bring the car in?
Mobile installers who use premium films like 3M Ceramic IR or 3M Crystalline tend to see fewer repeat edge failures, because proper adhesive residue removal and clean glass prep before re-installation matter as much as the film itself. If a re-seal or fresh install is where you're headed, mobile ceramic tint service brings that same controlled process straight to your driveway, starting at $249. For homes and offices dealing with similar edge issues on window film, the same mobile scheduling applies through Southmiamitint's mobile installation service.
Why Most Tint Edge Advice Skips the Time Factor
The guides that circulate online treat every lifted edge like it's fixable with enough heat and patience. That's not what the evidence actually supports. Contamination is the real dividing line, and contamination is a clock, not a checklist item you can put off.
What gets underrated is how fast a clean bubble turns into a dirty one. Leave a small lift alone for three weeks while you "keep an eye on it," and you've likely turned a fifteen-minute pin-prick fix into a job that needs full replacement. The conventional wisdom of "try heat first, worry about replacement later" has it backward for anyone dealing with a lift that's more than a few days old.
My take: prioritize diagnosis speed over repair perfection. A rough heat-and-compress attempt done within 48 hours of noticing the problem beats a technically flawless repair attempted three weeks in. If you're not confident the edge is clean, don't gamble on adhesive you bought online. A short mobile service call costs less than the frustration of redoing a failed DIY fix twice.
Frequently Asked Questions About Fixing Tint Edge Issues
Can I fix tint edge lifting myself, or do I need a professional? You can fix small, clean lifts under two inches yourself using heat and a squeegee. Larger lifts, visible contamination, or discoloration usually need a professional re-seal or replacement.
How long does window tint need to cure before I can fix edge issues? New installations need 3 to 5 days of curing before you touch the windows, per IWFA guidance. Trying to repair or even inspect edges too early can undo the initial bond.
What household products should I avoid when fixing tint edges? Avoid ammonia-based glass cleaners and any cyanoacrylate adhesive like Super Glue. Both damage the film's coating or the adhesive layer permanently.
Why does my tint keep lifting at the same edge? Repeated lifting at one spot usually points to leftover contamination from the original installation or an installer who skipped edge sealing. A professional re-seal that includes proper surface prep typically solves this for good.
Is a small bubble the same problem as edge lifting? No. Bubbles are trapped air or moisture in the middle of the film, while edge lifting is a bond failure at the perimeter. Bubbles often respond to the pin-prick method, while lifting needs re-bonding or replacement depending on contamination.
Sources
- IWFA
For repairs beyond a small edge lift, contact IWFA or a mobile installer directly for a hands-on assessment.