
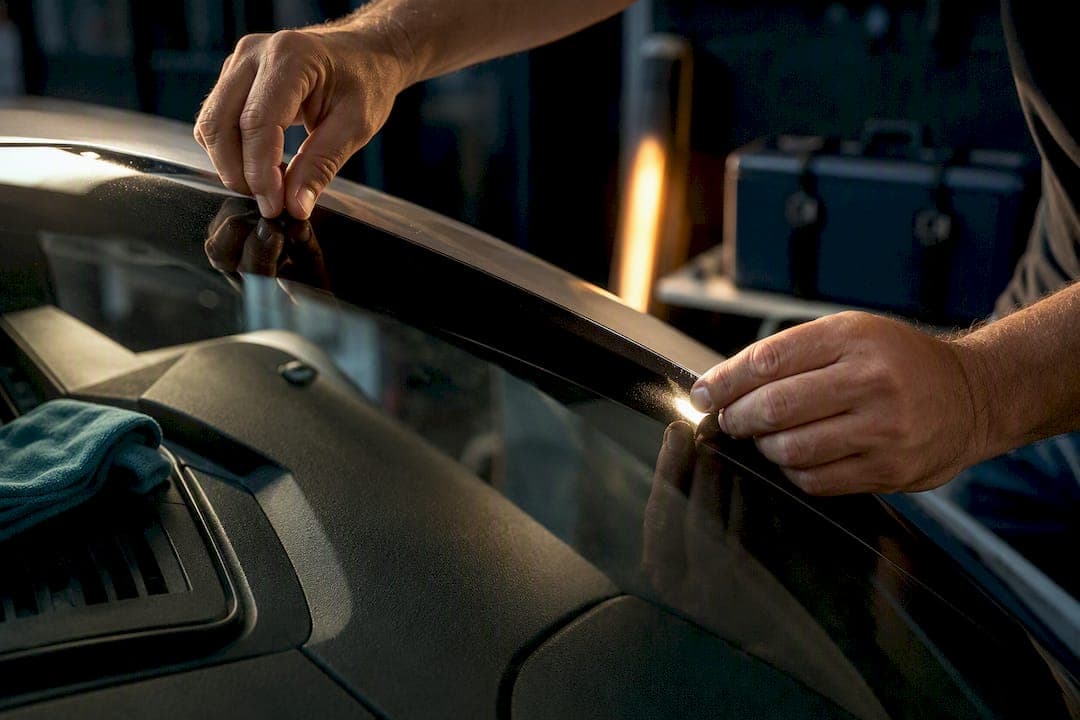
A windshield tint strip cuts glare from overhead sun fast and cheap, but it won't touch the low, blinding light you get at sunrise or sunset. If you just want to knock down brightness at the top of your glass, a precut kit installed yourself is a fine weekend project. If you want it to actually look clean, hold up for years, and stay on the right side of your state's AS-1 line, book a professional install.
TL;DR:
- Most states allow windshield tint strips only within the AS-1 line, with placement restrictions that vary and can result in tickets if misunderstood.
- Universal trim-to-fit kits are budget-friendly but require precise measurement and trimming, whereas precut kits offer a faster, cleaner application specific to your vehicle.
- Applying the tint above the AS-1 line with reflective or mirrored films is often illegal, and players should check local regulations to avoid fines.
- DIY installation demands patience and proper cleaning, while professional installs provide better fit, warranty, and heat rejection, especially for curved or complex windshields.
- Ceramic films outperform dyed options in heat rejection, optical clarity, and long-term durability, making them the preferred choice for high-performance windshield tinting.
Table of Contents
- What Is a Windshield Tint Strip, and What Types Are Sold?
- Is a Windshield Tint Strip Legal in Your State?
- DIY or Professional Install: How Do You Decide?
- Which Film Type and VLT Should You Choose?
- Why We Recommend Vehicle-Specific Precuts and Ceramic Film
- Get a Mobile Ceramic Tint Install From Southmiamitint
- Where to Read More Before You Buy or Book
- Sources
What Is a Windshield Tint Strip, and What Types Are Sold?
You'll see this product marketed under several names: windshield eyebrow tint, visor strip tint, sunstrip, and brow strip. They all mean the same thing. It's a narrow band of tint film applied to the top few inches of your windshield, inside the glass, to knock down glare from overhead sun without darkening your whole field of view.
The market splits into two basic formats. Universal rolls are trim-to-fit: you buy a long strip of film and cut it to match your windshield's curve using a template or your own measurements. Vehicle-specific precut kits arrive already shaped to your exact make and model, which saves time and reduces the odds of a crooked cut. Suppliers like Gila's glare strip kits package the film along with a squeegee, cutting template, and application spray, so you're not hunting for tools separately.
You'll also choose between static-cling and adhesive film. Static-cling strips grip the glass through suction and can be repositioned or pulled off without residue. Adhesive strips bond permanently and generally look more like a factory tint job once installed. Vendors like Rvinyl sell both types across a range of shade percentages, so you're not locked into one look.
A typical kit box includes:
- Precut or roll-format tint film
- A hard-card squeegee for pushing out air and water
- A cutting template (for universal rolls) or a shape already matched to your vehicle
- Application spray or soapy water solution
- Sometimes a trim tool or razor blade for edge cleanup
Choose precut if your vehicle is a common model and you want a clean fit without guesswork. Choose universal rolls if your car has an unusual windshield shape, if precuts aren't available for your model year, or if you prefer a lower-cost option and are willing to trim edges yourself.
Is a Windshield Tint Strip Legal in Your State?
Yes, in most states, but only within specific placement limits, and those limits vary enough that guessing wrong can cost you a fix-it ticket. The rule almost every state ties back to is the AS-1 line, a marking etched or printed near the top of your windshield by the glass manufacturer. Anything applied above that line is generally treated as a visor strip; anything below it starts falling under stricter windshield-tint regulations.
Here's how to find and use that line in practice:
- Look for a small "AS-1" etching in the corner of your windshield glass, usually near the rearview mirror mount.
- If you can't locate the etching, measure down from the top of the windshield. Many states default to a 5 or 6 inch allowance when no visible AS-1 mark exists.
- Confirm your local rule before cutting film, since some states use a percentage of the windshield height instead of a fixed inch measurement.
- Choose a non-reflective, neutral-tint film. Mirrored or highly reflective strips are banned outright in a number of states regardless of placement.
- Check your state DMV or state police website for the exact wording. Installer guides can help you understand the AS-1 concept, but only your state's own statute is the final word.
Statistic Callout: Vendor and installer resources selling precut sunstrip kits consistently frame the AS-1 line as the deciding factor in whether a strip is street-legal, and note that placement above it is what keeps eyebrow tint compliant in most jurisdictions, according to installer guidance on AS-1 placement.
The restrictions that trip people up most aren't about whether a strip is allowed. They're about how it's made. A perfectly legal strip height paired with a highly reflective or mirrored film can still get you cited. Full-windshield tint below the AS-1 line, outside of a documented medical exemption, is prohibited almost everywhere. And some states cap total coverage regardless of how far above the line you stay, so a wide strip that looks tasteful on a truck might exceed the legal maximum on a sedan with a shorter windshield.
If you're unsure, treat your local DMV page as the tiebreaker, not a forum post or a seller's product description. Our breakdown of window tinting pros and cons covers more of the compliance side if you want the fuller picture before you buy.
DIY or Professional Install: How Do You Decide?
Here's the honest tradeoff. DIY saves you money and can be done in an afternoon, but it demands patience, a dust-free workspace, and a tolerance for redoing a section if bubbles form. A professional install costs more upfront but gets you a vehicle-specific cut, warranty coverage, and confidence that the placement won't draw a second look from a traffic officer.
If you're going the DIY route, here's the sequence that actually works, drawn from installation walkthroughs that repeat the same core steps:
- Measure your desired strip height from the AS-1 line or top of the glass, and mark it lightly with removable tape.
- Clean the interior glass thoroughly with a lint-free cloth and glass cleaner, removing every trace of dust, fingerprints, and old adhesive residue.
- Align your precut kit or lay your universal roll against the marked area and trace or trim to fit.
- Spray the glass with the application solution generously, then peel and place the film while it's still wet.
- Squeegee from the center outward in overlapping strokes, pushing water and air bubbles toward the edges.
- Trim any excess film along the edges with a sharp blade, using light pressure to avoid scratching the glass.
- Let the film cure for at least 24 to 48 hours, and avoid rolling down windows or blasting the defroster during that window so the adhesive sets properly.
Tutorials like the Instructables windshield tint brow guide walk through this same wet-application, squeegee-out method, and they're worth a look before your first attempt.
Pro Tip: Work in the shade, not direct sun. Heat speeds up adhesive tack time and makes it much harder to reposition the film before it sets.
Professional installers bring a few advantages that are hard to replicate at home. They work from vehicle-specific precuts, so the fit matches your exact windshield curve without visible gaps or overlap. They know the AS-1 rules for your state cold, which removes the guesswork entirely. Most shops back the install with a warranty against bubbling, peeling, or discoloration, something a $20 DIY kit simply doesn't offer. And pro-grade films, particularly ceramic options, tend to go on with fewer micro-bubbles and clearer optical quality than the thinner dyed film in most universal kits.
Hire a pro if your windshield has a pronounced curve, if you're not confident measuring the AS-1 line yourself, or if you're set on a ceramic adhesive film rather than a basic static-cling strip. Those are exactly the situations where a small mistake is expensive to undo. If you're still weighing whether tinting makes sense for your vehicle at all, this pre-tint checklist is a useful gut check before you commit either way.
Which Film Type and VLT Should You Choose?
Film choice matters more than most buyers expect, because "tint" isn't one product. It's three distinct technologies with different price points and different real-world performance.
Dyed film is the cheapest option and the one you'll find in most bargain universal strip kits. It blocks visible light and adds a cosmetic dark look, but it does little for infrared heat and tends to fade to a purplish tint within a couple of years under strong sun.
Carbon film holds its color longer than dyed film and has a deeper, non-metallic finish that many owners prefer for appearance. It rejects a meaningful amount of heat without the fading problem, making it a solid middle-tier choice for a visor strip that needs to look good for the long haul.
Ceramic film is the top-tier option, built around ceramic particles that reject infrared heat and block UV rays without the signal interference or shine you get from older metallic films. It's also the clearest optically, which matters more on a top strip than you'd think, since your eyes are constantly scanning across that band at highway speed. Our page on 3M ceramic film performance breaks down how that heat rejection holds up in Florida-style heat specifically.
On VLT (visible light transmission), a few practical guidelines:
- For a top visor strip, a lower VLT (darker) is commonly chosen and generally stays within legal limits since it's above the AS-1 line.
- For anything approaching full windshield coverage, most states require a much higher VLT to preserve nighttime visibility.
- Avoid reflective or mirrored finishes on any windshield application. Vendors like Rvinyl sell strips in multiple VLT percentages precisely because buyers need to match shade to their state's allowance, not just their preference.
Statistic Callout: Insight from installers who work with both universal and precut products consistently points to one gap: vehicle-specific precut kits and professional-grade ceramic films noticeably reduce optical distortion compared with generic universal kits, especially along curved edges where cheap film tends to ripple.
Warranty coverage tends to track film quality. Dyed universal kits rarely carry more than a satisfaction guarantee from the seller. Carbon and ceramic installs from a professional shop commonly come with multi-year coverage against peeling, bubbling, and color shift, which is worth factoring into the sticker price difference. Our guide to choosing the right tint goes deeper into matching film grade to your climate and driving habits.
Why We Recommend Vehicle-Specific Precuts and Ceramic Film
Southmiamitint installs enough windshields in Miami-Dade's heat to know where universal kits fall short. A generic strip cut on your kitchen table can look fine from six feet away and still show waviness at the edges once the sun hits it directly. Vehicle-specific precuts eliminate that guesswork, and pairing them with a premium film like 3M Ceramic IR or Iviron KoolMax changes what the strip actually does for you day to day, not just how it looks on install day.
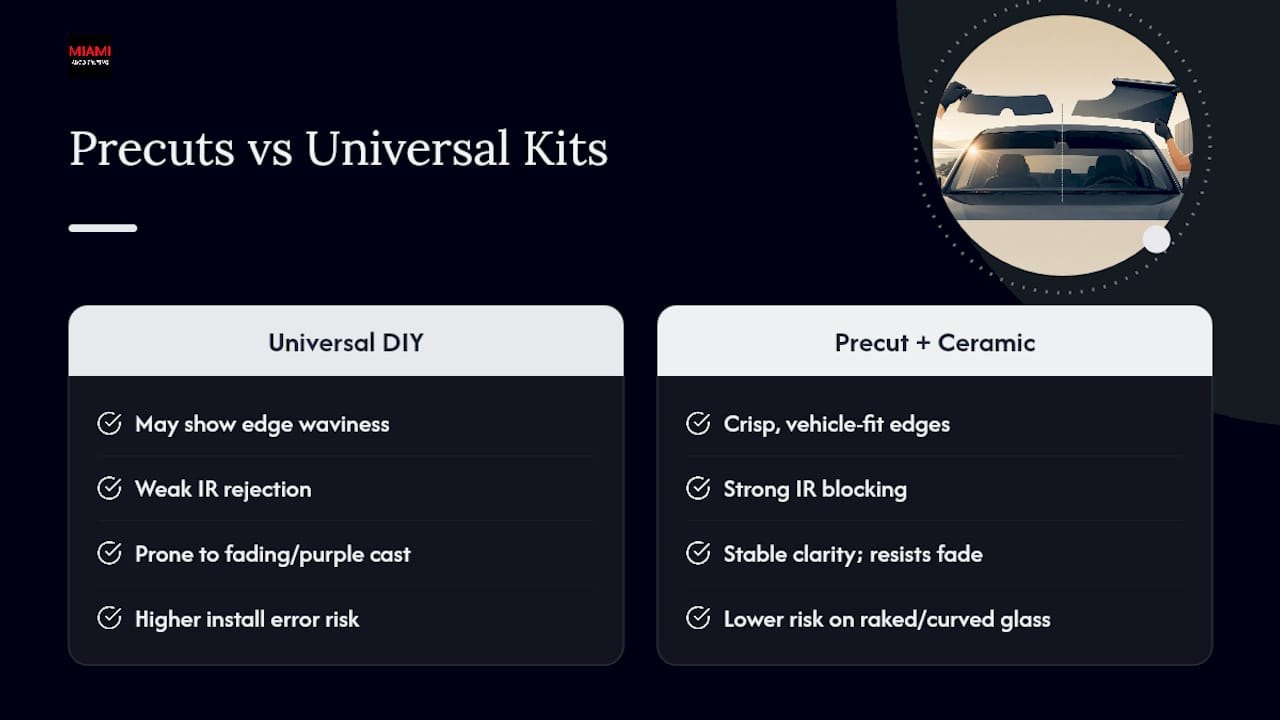
Heat rejection is where the difference is most obvious. In a market where cabin temperatures regularly spike past what a dyed strip can meaningfully offset, ceramic film's IR-blocking properties do real work, not just cosmetic work. Clarity holds up better over time too, since ceramic doesn't carry the fading or purpling that eventually shows up in cheaper dyed products.
The cases where professional install matters most are the ones with the least margin for error: vehicles with aggressive windshield rake, glass with a high curvature near the A-pillars, or any owner planning to keep the car long enough that resale condition matters. A crisp, evenly applied strip reads as maintained. A bubbled DIY job reads the opposite.
— Jose
Get a Mobile Ceramic Tint Install From Southmiamitint
If you've read this far, you already know the tradeoff: a DIY strip is fine for a quick glare fix, but a professional ceramic install is what actually holds up in Miami-Dade's heat and sun without a second trip to fix bubbling or peeling. Southmiamitint is the alternative to guessing at a universal kit. We bring vehicle-specific precuts and premium film, including 3M Ceramic IR, 3M Color Stable, and Iviron KoolMax ceramic, straight to your driveway or office parking lot.
Every mobile install stays within your state's AS-1 placement rules, so you're not left wondering if that fresh strip will draw a ticket. Ceramic mobile tint packages start at $249, and every job comes backed by a warranty that a $20 retail kit simply can't match. If you want the fit, the heat rejection, and the peace of mind in one visit, check pricing and book a time that works for your schedule.
Where to Read More Before You Buy or Book
For product specifics, check Gila's glare strip kits and Northern Tint's precut sunstrip kits for how vendors spec film grade and fit. For a cleaning technique that maps directly to windshield prep, the streak-free glass method from Diamondbrite is a solid reference. Above all, treat your state DMV or legislative page as the final word on legal placement, not a seller's product page or a forum thread.
Sources
- Windshield Sunstrip Tint Kits | Precut Sun Visor Film | Northern Tint
- Windshield Tint Brow : 7 Steps - Instructables