
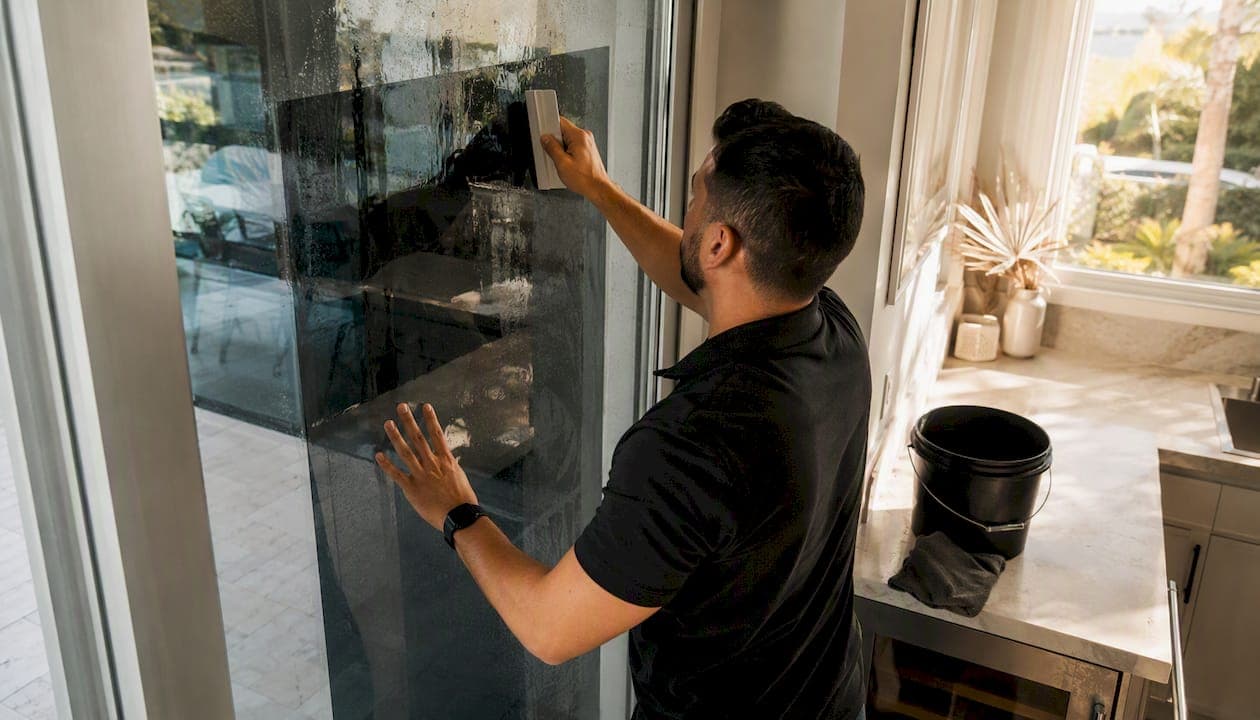
The most reliable privacy film selection workflow follows six steps: identify the zone, pick the film family, check glass compatibility, test a sample, decide DIY vs. professional installation, then confirm sizing and warranty before committing. That sequence works for most residential and commercial windows, and skipping any step is where costly mistakes happen.
Here is the workflow you can follow right now:
- Identify the zone. Bathroom, bedroom, conference room, storefront, or office partition? Each has different privacy requirements and lighting conditions.
- Pick the film family. Frosted, one-way reflective, blackout, decorative, gradient, or switchable smart film. Match the film's privacy mechanism to the zone's needs.
- Check glass compatibility. Tempered, laminated, double-pane (insulated glass unit), or low-e coated glass each has specific film restrictions. Confirm before ordering.
- Test a sample. Mount a small panel, observe it in daylight and after dark, and check adhesion after several days.
- Decide DIY vs. professional installation. Small, flat windows on single-pane glass are manageable DIY projects. Large panes, specialty glazing, or security-grade film call for a certified installer.
- Finalize size, warranty, and install. Measure the visible glass area, confirm the manufacturer's warranty terms, and schedule installation.
Quick decision prompts by scenario:
- Bathroom: Frosted or etched film for consistent, around-the-clock privacy.
- Conference room: Frosted or gradient film to preserve daylight while blocking sightlines.
- Storefront: One-way reflective for daytime privacy, or decorative film for branding.
- Bedroom: Blackout or high-opacity frosted film if nighttime privacy is the priority.
Key Takeaways
The most reliable privacy film selection workflow starts with the zone, checks glass compatibility before ordering, and tests a sample before committing to full panels.
| Point | Details |
|---|---|
| Zone first, film second | Identify the room's privacy need and lighting conditions before choosing a film family. |
| Night behavior is a separate check | One-way reflective films reverse after dark; always test with interior lights on before committing. |
| Glass compatibility is non-negotiable | Double-pane IGUs and low-e coatings restrict which films are safe to apply; confirm before ordering. |
| Sample testing prevents costly mistakes | A 12-by-12-inch sample applied for 7 days reveals adhesion issues, night behavior, and real VLT. |
| Southmiamitint for professional installs | Mobile on-site installation with 3M Ceramic IR, 3M Color Stable, and Iviron KoolMax across Miami-Dade. |
Table of Contents
- What does each privacy film family actually do?
- Which film works best for your specific room or zone?
- How do privacy choices affect light, heat, UV protection, and views?
- What glass types and measurements do you need to check first?
- Should you install privacy film yourself or hire a professional?
- How long does privacy film last, and how do you maintain it?
- How to test a privacy film sample before you commit
- What most people get wrong when choosing privacy film
- Southmiamitint brings installer-grade privacy film directly to your location
- Sources
What does each privacy film family actually do?
Understanding the film families is the fastest way to narrow your options. Each type achieves privacy through a different mechanism, and that mechanism determines how the film behaves in daylight versus after dark.
Privacy film categories are commonly grouped as frosted/etched, decorative/pattern, one-way reflective, blackout/whiteout, gradient, and switchable smart film. Here is what each one does in practice.
Frosted and etched films scatter light rather than block it. They create consistent opacity from both sides at any time of day. Frosted finishes typically maintain a VLT above roughly 60%, so the room stays bright while silhouettes are obscured. This makes them the go-to choice for bathrooms, interior glass partitions, and office doors.
Decorative and pattern films prioritize aesthetics. They use printed or textured designs to add visual interest while providing partial or full privacy. Privacy performance varies widely by pattern density, so always check the VLT before ordering.
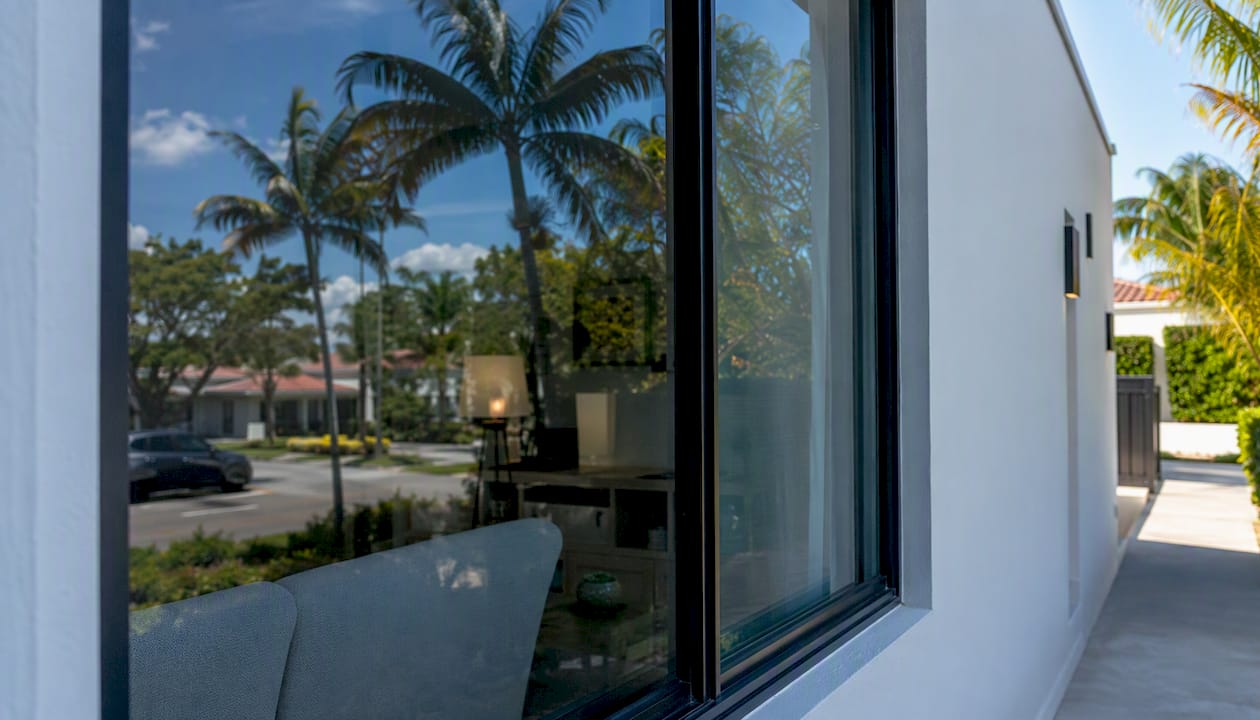
One-way reflective films work by creating a brightness differential. The brighter side sees a mirror; the darker side sees through. During daylight hours, the exterior is brighter, so people outside see their reflection while you see out clearly. That behavior reverses after dark when interior lighting makes your side brighter. Storefronts and ground-floor offices benefit from these films during business hours, but they offer no nighttime privacy without supplemental window treatments.
Blackout and whiteout films block nearly all light transmission. They are the right call for server rooms, darkrooms, or any space where complete visual and light control is required. Whiteout versions diffuse light rather than absorbing it, which keeps the exterior appearance clean.
Gradient and partial films apply opacity only to a specific band of the glass, typically at eye level. They are common in conference rooms and reception areas where you want to block seated sightlines while keeping the upper glass clear for daylight.
Switchable smart films use electrochromic or PDLC (polymer-dispersed liquid crystal) technology to toggle between clear and opaque states with a switch or app. They are the most expensive option by a significant margin and require electrical integration, but they offer on-demand privacy without any permanent visual change to the glass.
Pro Tip: For any one-way reflective film, always test the night behavior before committing to a full install. Place a lit lamp behind the glass after dark and check from outside. What you see is exactly what your neighbors or passersby will see every evening.
Which film works best for your specific room or zone?
Matching the film to the zone is where the window film selection process gets practical. Identifying the primary problem per glass zone — heat, privacy, security, or aesthetics — before selecting a film is the most reliable approach for both residential and commercial projects.
| Zone | Best film family | Key tradeoff |
|---|---|---|
| Bathroom | Frosted/etched | Consistent 24/7 privacy; minimal view loss matters less here |
| Bedroom | Blackout or high-opacity frosted | Full night privacy; room gets darker during the day |
| Conference room | Frosted or gradient | Daylight preserved; gradient limits only seated sightlines |
| Storefront | One-way reflective or decorative | Daytime privacy only for reflective; decorative adds branding |
| Reception area | Frosted or light decorative | Professional appearance; avoids mirror effect on clients |
| Office partition | Frosted or gradient | Collaboration feel with visual separation |
| Exterior façade | Solar-control with privacy tint | Heat rejection plus daytime privacy; requires exterior-grade film |
Two contrasting choices for the same zone illustrate the tradeoff clearly. A conference room with frosted film gives consistent privacy all day and night, which is ideal when the room is used for sensitive meetings in the evening. The same room with a one-way reflective film looks sleek during business hours but becomes fully transparent after dark when the lights are on inside. For a 9-to-5 office, reflective may be fine. For a law firm that works late, frosted is the safer call.
For storefronts, decorative film adds brand graphics and partial privacy without the nighttime reversal problem. Reflective film maximizes daytime privacy and solar control but requires the business to add interior blinds or shades for after-hours coverage.
How do privacy choices affect light, heat, UV protection, and views?
Every privacy film changes more than just visibility. Understanding four key metrics lets you compare product data sheets and make real tradeoffs between privacy, daylight, energy savings, and view quality.
Visible Light Transmission (VLT) is the percentage of visible light that passes through the film. Higher opacity films carry lower VLT values.
Solar Heat Gain Coefficient (SHGC) measures how much solar energy enters through the glass. Lower SHGC means less heat gain. Solar-control films with privacy tinting can reduce SHGC significantly, which translates directly to lower cooling costs in warm climates like Miami-Dade.
Total Solar Energy Rejected (TSER) is the flip side of SHGC: the percentage of incoming solar energy the film blocks or reflects. A higher TSER means better heat rejection. Ceramic films, including 3M Ceramic IR and Iviron KoolMax, tend to post strong TSER numbers without the heavy tint that reduces VLT dramatically.
UV blockage is the percentage of ultraviolet radiation the film stops. Certain 3M privacy and safety films claim high UV protection, which matters if furniture, flooring, or artwork fading is a concern.
The WBDG's technical overview of window film performance is a solid reference for matching these metrics to building requirements.
Quick data-sheet checklist:
| What you need | What to look for on the spec sheet |
|---|---|
| Daytime privacy only | Reflectance >30% exterior; confirm VLT differential |
| All-day/night privacy | Opacity rating; frosted finish |
| Heat rejection + privacy | TSER high; ceramic or IR-rejecting film |
| UV protection | UV blockage ≥99% |
| Daylight preservation | VLT ≥50%; frosted finish preferred |
Check the night behavior column separately. If the spec sheet does not address nighttime visibility, request a sample and test it yourself before ordering full panels.
What glass types and measurements do you need to check first?
Glass compatibility is the step most DIYers skip, and it is the one that causes the most expensive problems. Applying the wrong film to incompatible glass can cause thermal stress fractures, delamination, or voided glass warranties.
Common glazing types and their film restrictions
- Tempered glass is heat-strengthened and generally accepts most interior films, but dark or high-absorption films can create uneven thermal stress. Stick to lighter films or ceramic options with low absorption.
- Laminated glass (safety glass with an interlayer) is usually compatible with most films, but confirm with the film manufacturer before applying anything to the interior surface.
- Double-pane insulated glass units (IGUs) are the most restrictive. High-absorption films trap heat in the air gap, which can cause seal failure and fogging. Always check the manufacturer's approved film list before applying to any IGU.
- Low-e coated glass has a metallic coating that can interact with certain reflective films. Interior low-e coatings are particularly sensitive. Request a compatibility letter from the film manufacturer.
- Body-tinted glass already absorbs solar energy. Adding a dark or high-absorption film compounds that load and increases thermal stress risk.
Architects and specifiers use sample panels and technical data sheet (TDS) review to confirm VLT and obscuration values on the specific glazing in use before committing to a full installation. That same practice applies to any residential or commercial project.
How to measure your windows correctly
- Measure the visible glass area only, not the frame. Width and height of the glass pane itself.
- For most interior applications, subtract 1/8 inch from each edge (1/4 inch total per dimension) to allow for an edge gap. This prevents the film from lifting at the frame.
- Measure each pane individually. Windows in the same opening often vary slightly in size.
- Order samples before full panels on any window larger than 24 inches wide or on any specialty glazing.
Warning: Never apply exterior-grade film to interior glass without confirming the product is rated for that application. Exterior films use different adhesive systems and UV-stable coatings that are not interchangeable with interior products.
Should you install privacy film yourself or hire a professional?
The honest answer depends on the glass size, the film type, and how much risk you are willing to take with your warranty. Window film reduces cooling loads and furniture fading, but larger or specialty glazing benefits from professional installation. Here is how to decide.
Step-by-step DIY installation overview
- Clean the glass thoroughly. Any dust, grease, or residue under the film creates permanent bubbles. Use a lint-free cloth and a streak-free glass cleaner. Allow the glass to dry completely.
- Measure and cut the film. Cut slightly oversized (about 1/2 inch extra on each side). You will trim to final size after application.
- Wet the glass. Fill a spray bottle with water and a few drops of dish soap. Spray the glass surface generously. This gives you time to reposition the film.
- Peel the liner and apply. Peel the release liner from the film while misting the adhesive side lightly. Lay the film onto the wet glass.
- Squeegee from center outward. Use firm, overlapping strokes to push water and air toward the edges. Work methodically to avoid trapping bubbles.
- Trim the edges. Use a sharp utility knife and a straight edge to trim the film to the edge gap measurement. A dull blade tears the film.
- Final squeegee pass. Go over the entire surface one more time, paying attention to the edges and corners.
- Allow to cure. Most films take 3–7 days to fully cure. Small water bubbles during this period are normal and will disappear as the film dries.
Tools you need
- Spray bottle with soapy water solution
- Hard-card squeegee or professional film squeegee
- Sharp utility knife with fresh blades
- Straight edge or T-square
- Lint-free microfiber towels
- Tape measure
Common installation mistakes to avoid
- Applying film to dirty or wet glass
- Skipping the edge gap, which causes edge lift within weeks
- Using a dull blade that tears or drags the film
- Rushing the squeegee pass and leaving water pockets
- Applying film in direct sunlight, which causes the adhesive to set too fast
When to hire a professional installer
- Glass panels wider than 36 inches or taller than 60 inches
- Any double-pane IGU where thermal stress is a concern
- Security or safety film (these require specific pressure and edge-sealing techniques)
- Exterior-grade film applications
- Any install where the glass manufacturer's warranty is still active
- Curved or shaped glass
For a broader look at professional vs. DIY installation tradeoffs, the same decision criteria that apply to paint protection film apply here: complexity, glass value, and warranty sensitivity all push toward hiring a certified installer.
How long does privacy film last, and how do you maintain it?
Privacy film is a long-term investment when it is installed and maintained correctly. Lifespan varies by film family, installation quality, and exposure conditions.
Cleaning and care
- Wait at least 30 days after installation before cleaning with anything other than a soft, damp cloth. The adhesive needs time to fully cure.
- Use a mild, ammonia-free glass cleaner. Ammonia degrades the film's surface coating over time.
- Apply cleaner to the cloth, not directly to the film. Excess liquid at the edges can work under the film and cause lifting.
- Use a soft microfiber cloth only. Abrasive pads or paper towels scratch the film surface.
- For ongoing care, a streak-free cleaning method applied gently to the film surface keeps it looking clear without damaging the coating.
Typical lifespan by film family
- Interior frosted and decorative films: 7–12 years with proper care in a climate-controlled environment.
- Solar-control and reflective films (interior): 10–15 years for quality products from established manufacturers.
- Exterior-grade films: 5–10 years depending on UV exposure, cleaning frequency, and climate. Miami-Dade's high UV index shortens this range compared to northern climates.
- Switchable smart films: Lifespan depends heavily on the electrical components; the film layer itself is durable, but the switching mechanism may require service.
Factors that shorten film life include poor installation (especially edge lift), high solar loads on dark films, exterior exposure without UV-stable coatings, and aggressive cleaning chemicals.
What to check in warranty terms
- Edge lift exclusions: Many warranties exclude edge lift caused by improper installation or cleaning.
- Indoor vs. outdoor ratings: Confirm the film is rated for the application. Using an interior film outdoors voids the warranty immediately.
- Transferability: Some manufacturer warranties transfer to a new property owner; others do not. This matters for commercial properties.
- Installer certification: Several manufacturers, including 3M, require installation by a certified dealer for the warranty to be valid. A DIY install on a 3M film may void coverage.
To preserve your warranty, keep the installation receipt, the product's technical data sheet, and any certification documentation from your installer.
How to test a privacy film sample before you commit
Ordering a sample panel before a full install is one of the most practical steps in the entire window film selection process. Consumer Reports' hands-on testing methodology evaluated films for transparency, scratch resistance, durability, and installation ease. You can run a simplified version of that same process on any window in your home or facility.
Sample test workflow
- Cut a 12-by-12-inch sample panel from the film roll or sample kit. This size is large enough to reveal real-world adhesion and optical behavior.
- Apply it to a representative pane using the standard soapy-water method. Choose a window that matches the glazing type you plan to film.
- Observe in daylight. Stand outside and check how much you can see through the film. Note whether the privacy level matches the product description.
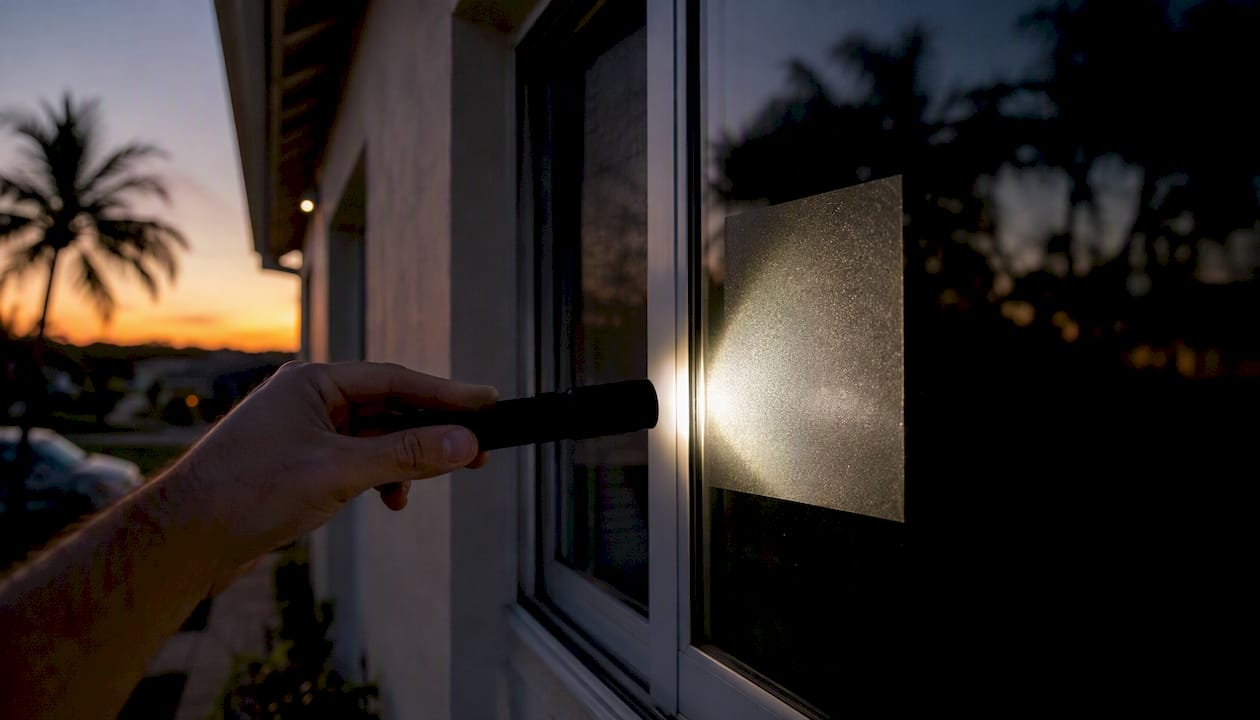
- Run the flashlight test for night behavior. After dark, turn on interior lights and hold a flashlight behind the film from inside. Step outside and look at the window. What you see is what anyone outside will see at night.
- Check adhesion after 7 days. Lift one corner gently. If the film peels easily or shows bubbling at the edges, the adhesion is inadequate for that glass type.
- Scratch the surface lightly with a fingernail. Quality films resist light surface contact without visible marks.
What the tests reveal
The nighttime flashlight test catches the most common expensive mistake: installing a one-way reflective film on a space that needs 24/7 privacy. The adhesion check after a week identifies compatibility problems with double-pane glass or low-e coatings before you commit to full panels. Bubbling that appears within the first few days and does not resolve during the cure period usually signals a glass compatibility issue, not an installation error.
Pro Tip: Request samples from at least two film families before deciding. Mounting both side by side on the same window gives you a direct visual comparison under identical lighting conditions, which no product photo or spec sheet can replicate.
What most people get wrong when choosing privacy film
The single most common mistake is choosing a film based on how it looks in a showroom or product photo, then discovering it behaves completely differently on the actual glass in the actual room. Showroom lighting is controlled. Your bathroom window at 7 PM is not.
The second mistake is skipping the glass compatibility check. Double-pane windows are now standard in most homes built after 2000, and a significant number of films are not rated for IGU application without specific installer guidance. Applying a high-absorption film to a sealed double-pane unit can crack the glass seal within months, and that repair cost far exceeds what a professional install would have cost upfront.
There is also a tendency to over-specify. Buyers frequently jump to blackout or near-blackout films because they want certainty, then regret the loss of natural light. Test the sample first.
One detail that rarely appears on retail product pages: the edge gap matters more than most DIYers realize. A film trimmed flush to the frame looks clean on day one but starts lifting within weeks as the adhesive at the exposed edge dries out. A 1/8-inch gap on each side is not visible from a normal viewing distance, and it adds years to the film's service life.
For Miami-Dade specifically, the high UV index and year-round solar load mean ceramic films outperform dyed films in longevity. Dyed films fade and delaminate faster under sustained UV exposure. That is why installer-grade ceramic options like 3M Ceramic IR and Iviron KoolMax hold up better in this climate than entry-level alternatives.
Southmiamitint brings installer-grade privacy film directly to your location
Choosing the right film is one part of the process. Getting it installed correctly, on the right glass, with the right warranty, is the other. Southmiamitint's mobile ceramic window tint service covers residential and commercial properties across Miami-Dade County, with on-site installation at your location so you never have to transport glass panels or coordinate a shop visit.
The films Southmiamitint installs are the same installer-grade products referenced throughout this guide: 3M Ceramic IR for maximum heat rejection and UV protection, 3M Color Stable for reliable long-term performance, and Iviron KoolMax ceramic tint for high solar energy rejection in Miami's climate. Every install includes a glass compatibility check before application, so you are not guessing about IGU or low-e coating restrictions. Warranty registration is handled at the time of install.
To get a quote or schedule your mobile installation, visit the mobile tinting pricing page or call to request a sample consultation at your property.
Sources
The following sources shaped the workflow and testing methodology in this guide:
- Best window films | Consumer Reports
- Window film fundamentals | Whole Building Design Guide (WBDG)
- Best window film | BobVila