The multi-layer tinting process applies multiple engineered film layers to vehicle glass, with each layer targeting a different part of the solar spectrum to deliver UV protection, heat rejection, and long-term durability that no single film can match. Modern automotive window films from brands like 3M and Iviron Kollmax are built from a stack of functional layers including a PET base, solar-control layers, UV inhibitors, pressure-sensitive adhesive, and a hardcoat scratch-resistant surface. The industry term for this construction is "multi-layer film lamination," and understanding how it works changes how you shop for tint, evaluate installers, and care for your windows after installation.
What materials and tools does the multi-layer tinting process require?
Getting the right materials before you start is the difference between a tint job that lasts a decade and one that bubbles within a year. The film itself is the most critical variable. Nano-ceramic films like 3M Crystalline, 3M IR Series, or Iviron Kollmax carry certified UV and infrared rejection specs printed on the box. Those specs matter because inferior adhesives fail under prolonged sun exposure, causing peeling and bubbling that no amount of careful installation can prevent.
Here is what you need before touching the glass:
- Multi-layer tint film rolls with documented VLT (visible light transmission) and IR rejection ratings
- Positioning spray made from water mixed with a few drops of baby shampoo or dish soap (no conditioners)
- Hard card squeegee and a felt-tipped squeegee for final passes without scratching
- Single-edge razor blades for trimming edges and removing old adhesive
- Lint-free microfiber cloths for glass prep and final wipe-downs
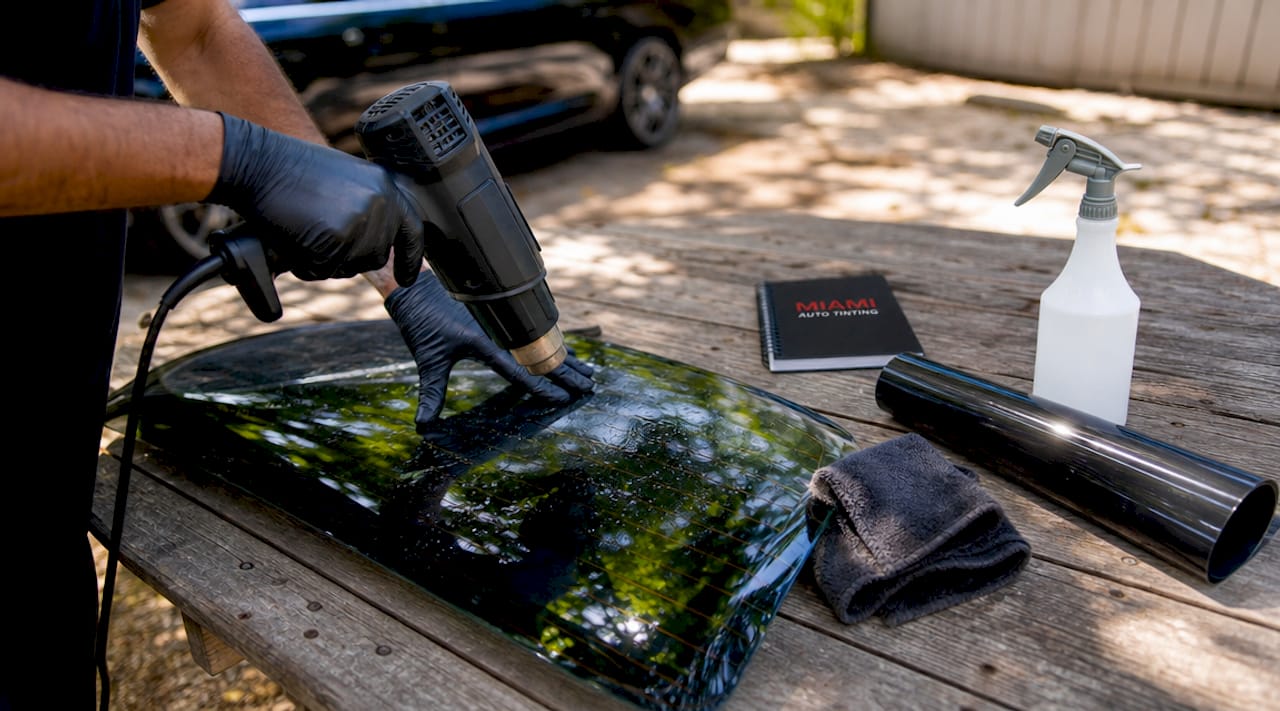
- Heat gun or hair dryer for conforming film around curved rear windows
- Cutting mat and straight edge for precise film sizing before application
The workspace matters as much as the tools. Dust particles trapped under the film create permanent contamination points. A clean garage with the doors closed, swept floor, and no fans running is the minimum standard. Professional shops use filtered air environments, which is one reason DIY versus professional installation produces such different results.
Pro Tip: Choose films with independently certified UV and IR rejection specs rather than relying on tint darkness alone. A clear nano-ceramic film can outperform a dark dyed film on every heat and UV metric.
How to apply multi-layer tint film: step-by-step installation
Applying tint correctly requires patience at every stage. Rushing any single step compounds into visible defects that cannot be fixed without removing the film entirely.
-
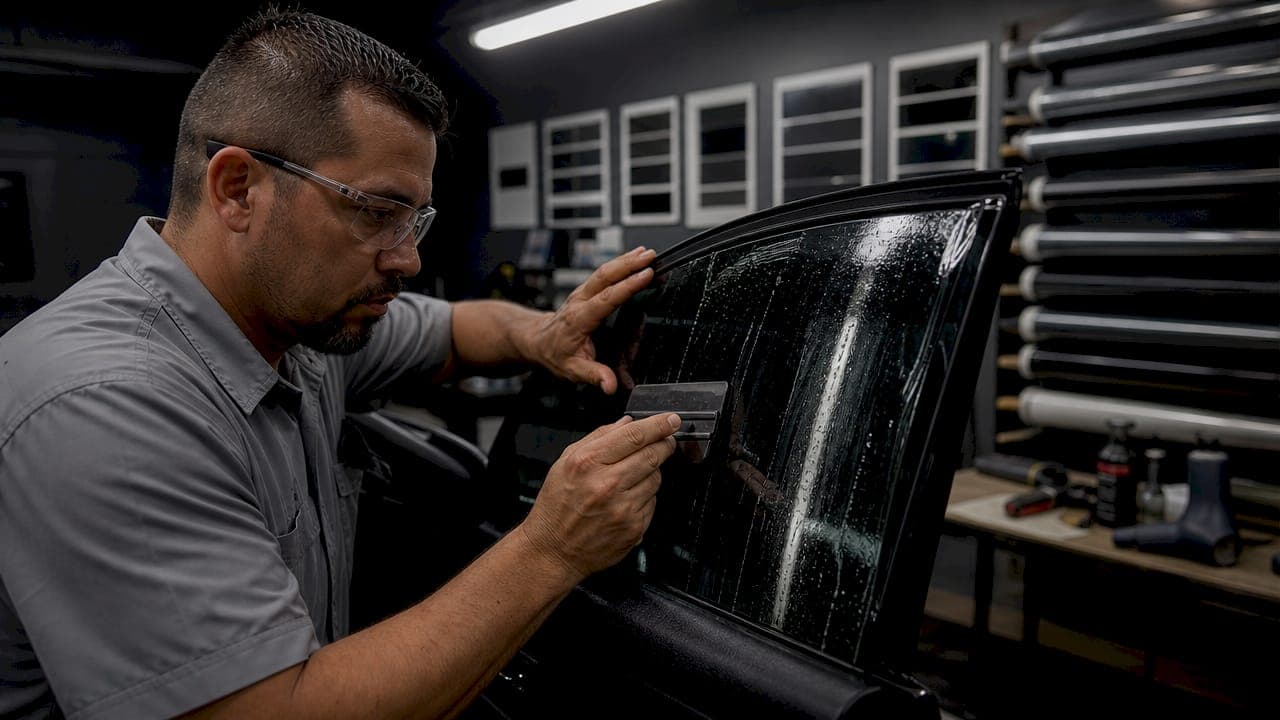
Clean the glass thoroughly. Spray the interior glass surface with your positioning solution and scrub with a lint-free cloth. Follow with a razor blade pass to remove any adhesive residue, paint overspray, or mineral deposits. Wipe dry and inspect under a flashlight held at a low angle to catch remaining debris.
-
Prepare your positioning solution. Mix water with two to three drops of baby shampoo in a spray bottle. This solution keeps the film mobile on the glass long enough to reposition it before the pressure-sensitive adhesive grabs. Too much soap slows curing; too little gives you no working time.
-
Cut film to size. Roll out the film on a clean cutting mat with the liner side down. Cut pieces roughly one inch larger than each window on all sides. Label each piece to match its window so you are not guessing during application.
-
Wet the glass and peel the liner. Spray the glass generously. Peel the liner from the film while misting the adhesive side with positioning solution. Never let the adhesive touch anything dry during this step.
-
Place the film on the glass. Lay the film adhesive-side down onto the wet glass. You have about 60 seconds to slide it into position before the adhesive starts to grab. Center the film with equal overlap on all edges.
-
Squeegee out the solution. Starting from the center, use firm overlapping strokes toward each edge. Work methodically. Every stroke pushes water and air toward the perimeter. Switch to a hard card squeegee for the final passes to remove as much moisture as possible.
-
Trim the edges. Use a razor blade and straight edge to trim the film flush with the window frame. Hold the blade at a consistent shallow angle to avoid scoring the glass or the rubber seal.
-
Final squeegee pass. Run the felt squeegee over the entire surface one more time after trimming. This seats the edges and removes any solution that crept back under the film during cutting.
If you are applying multiple film layers as part of a multi-tiered tinting method, each layer must cure partially before the next goes on. Stacking wet films traps moisture between layers and guarantees bubbling.
Pro Tip: For rear curved windows, use a heat gun on low setting to shrink the film gently around the curve before final squeegee passes. This eliminates the "fingers" that form when flat film is forced onto a compound curve.
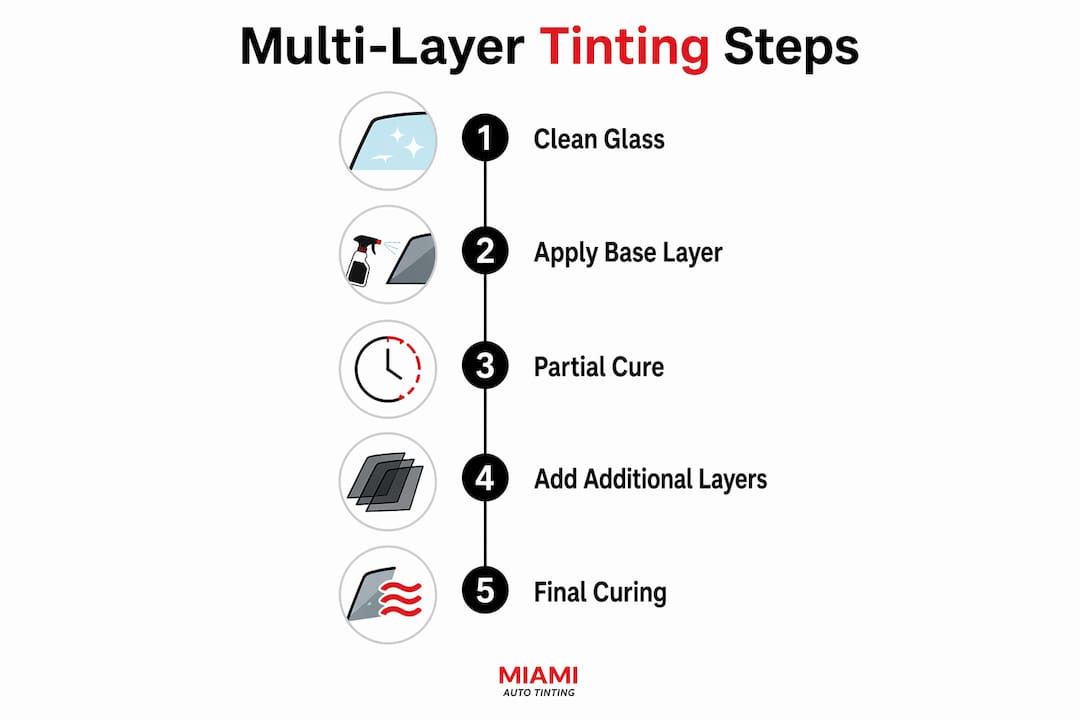
The stacking order and layer thickness directly affect visible light transmission consistency and heat rejection efficiency. Follow the film manufacturer's recommended layering sequence without improvising.
What to expect during curing and how to care for your tint
Curing is where most tint failures happen, and most of them are caused by impatience. The film may look perfect within 48 hours, but that visual clarity does not mean the adhesive has fully bonded. Full adhesive bonding takes about 30 days, and treating the film as finished before that point causes peeling that cannot be reversed.
What you will see during curing is normal and temporary:
- Haze or cloudiness in the first few days, especially in cooler weather or with thicker ceramic films
- Small water pockets that look like bubbles but are actually trapped moisture migrating toward the edges
- Slight color variation across the film surface as different areas dry at different rates
Curing timelines vary by film type. Dyed films visually clear in 3 to 14 days. Ceramic films need 7 to 21 days. Complex nano-layer films can take up to 45 days for complete adhesive strength. All of them require treating 30 days as the minimum before any cleaning or window operation.
Follow these aftercare rules without exception:
- Do not roll down tinted windows for at least 3 to 7 days after installation
- Do not clean the interior glass surface for a minimum of 30 days
- When you do clean, use an ammonia-free cleaner and a soft microfiber cloth only
- Park in shade when possible during the first two weeks to reduce thermal stress on the curing adhesive
- Do not apply stickers, suction cups, or anything adhesive to the tinted surface during curing
Pro Tip: Read the manufacturer's aftercare and warranty documentation before installation, not after. Some warranties are voided by specific cleaning products or window tint sprays that seem harmless.
How do multi-layer films block heat and UV differently than single-layer films?
Single-layer dyed films work by absorbing solar energy and converting it to heat within the film itself. That heat then radiates inward and outward. The result is reduced glare but limited heat rejection, and the dye fades over time as UV degrades the colorants.
Multi-layer films operate through three simultaneous mechanisms. Absorption, reflection, and transmission control each target different parts of the solar spectrum. UV inhibitor layers block wavelengths below 400nm. Ceramic or metallic nanoparticle layers reflect near-infrared radiation before it converts to heat inside the vehicle. The PET base and hardcoat manage visible light transmission to keep the interior view clear.
| Feature | Single-layer dyed film | Multi-layer nano-ceramic film |
|---|---|---|
| UV rejection | Up to 99% (varies by quality) | Up to 99% consistently |
| IR heat rejection | Low (10 to 40%) | Up to 95% |
| Heat mechanism | Absorption only | Absorption + reflection + spectral control |
| Fade resistance | Low (dye degrades) | High (ceramic particles are stable) |
| Visible clarity | Can reduce clarity | Maintains high optical clarity |
The most important misconception to correct is that darker tint means better heat rejection. Darker tint does not guarantee better heat rejection. A 70% VLT nano-ceramic film from 3M or Iviron Kollmax blocks more infrared heat than a 5% VLT dyed film. The performance comes from the layer engineering, not the shade. This is why Miami drivers running legal VLT levels can still get serious heat protection with the right film selection. For a deeper look at how layered films perform in South Florida conditions, the Miami heat and UV guide from Southmiamitint covers real-world performance data.
Key takeaways
The multi-layer tinting process delivers superior UV and heat protection through engineered film stacking, precise installation, and a full 30-day curing period that most car owners underestimate.
| Point | Details |
|---|---|
| Layer engineering drives performance | Each film layer targets UV, IR, or visible light separately for results no single layer achieves. |
| Materials quality determines longevity | Certified nano-ceramic films with quality adhesives outlast dyed films by years under UV exposure. |
| Installation precision is non-negotiable | Proper glass prep, positioning solution, and squeegee technique prevent bubbles and edge lifting. |
| Curing takes 30 days minimum | Visible clarity appears early, but full adhesive bonding requires 30 days before cleaning or window operation. |
| Darkness does not equal heat rejection | A light nano-ceramic film blocks more infrared heat than a dark dyed film due to spectral layer design. |
Why I tell every customer to stop judging tint by how dark it looks
After years of installing tint across Miami Dade, the single most common mistake I see is customers choosing films based on shade. They want the darkest legal tint and assume that means maximum protection. It does not. I have seen 35% VLT ceramic films outperform 15% VLT dyed films on every heat metric that matters, and the customer with the lighter film is always more comfortable in July.
The second mistake is treating the curing period as optional. I get calls every week from people who rolled their windows down on day two and now have peeling edges. The adhesive disruption during early curing is permanent. No amount of pressing the film back down fixes a bond that broke before it fully formed.
If you are doing this yourself, I respect that. But be honest about your environment. A dusty garage, a windy driveway, or a single contaminated squeegee pass will show up in the finished product. The common installation issues that end up as warranty claims almost always trace back to prep, not the film itself. Spend twice as long on glass cleaning as you think you need to. And choose films based on certified IR and UV specs, not the shade number on the box.
— Jose
Get professional multi-layer tinting in Miami with mobile service
Southmiamitint installs 3M IR, 3M Color Stable, and Iviron Kollmax ceramic tint using the full multi-layer film application process described in this guide. Every job uses films with certified UV and IR rejection specs, and the mobile service comes to your home, office, or parking lot anywhere in Miami Dade.
For drivers who want nano-ceramic performance without the guesswork of DIY installation, ceramic tinting from $249 includes mobile setup and professional aftercare guidance. If you want to explore 3M's nano-ceramic film options specifically, the 3M ceramic film page covers the full lineup with VLT and IR specs. Contact Southmiamitint for a quote and get the right film matched to your vehicle and your legal VLT requirements.
FAQ
What is the multi-layer tinting process?
The multi-layer tinting process applies several engineered film layers to vehicle glass, with each layer handling a specific function such as UV blocking, infrared heat rejection, adhesion, or scratch resistance. The combined stack delivers performance that no single-layer film can replicate.
How long does multi-layer tint take to cure fully?
Full adhesive bonding takes approximately 30 days, though visible clarity often appears within the first few days. Nano-ceramic and complex multi-layer films can require up to 45 days for complete cure depending on temperature and humidity.
Does darker tint block more heat?
No. Heat rejection depends on the film's layer engineering, not its shade. Nano-ceramic films with light VLT ratings block up to 95% of infrared heat, while dark dyed films with no ceramic layer may reject as little as 10 to 40% of infrared radiation.
Can I roll down my windows after tinting?
Avoid rolling down tinted windows for at least 3 to 7 days after installation. The pressure-sensitive adhesive needs time to bond to the glass, and early window operation stretches and separates the film from the edges.
What causes bubbles in window tint after installation?
Bubbles during the first 30 days are usually trapped moisture migrating out during curing and are normal. Bubbles that persist after 30 days typically indicate contamination during installation, poor adhesive quality, or premature window operation that disrupted the bond.